7 Pages are shown on the Main Page.

7 pages are shown on the Main Page. To see additional posts, click on the link "Older Posts" at the bottom of the main page. For videos go to https://www.youtube.com/@normanretzke4377/videos click "skip" to avoid ads


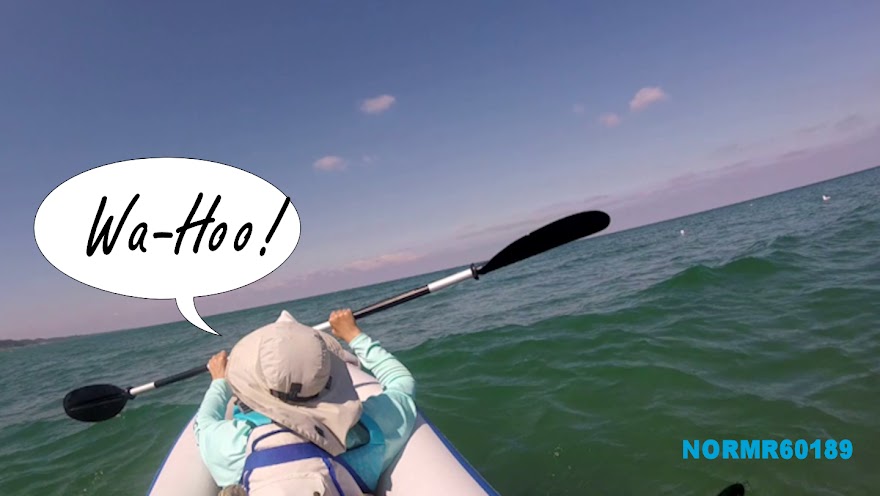
G has a "swell" time kayaking

G has a "swell" time kayaking
G has a "swell" time on Lake Michigan in an inflatable canoe

Dawn on the Gulf of Mexico

Dawn on the Gulf of Mexico

Warren Dunes Sunset

Warren Dunes Sunset
Warren Dunes Sunset

Monday, November 28, 2016

One of life's little boo-boos


Bookmark and Share


Things happen. On November 22 G took a tumble and the result was a mild concussion, a broken thumb, a sprained neck and numerous scrapes and bruises.

The symptoms of concussion were apparent and so I called 911. The local security was great and within minuted of placing my call the paramedics arrived. We discussed ER options, and they stated that G did show the signs of a concussion. So I was given two nearby hospitals which had the CAT scan equipment necessary to properly diagnose such an injury. I chose one and off they went. I followed about 10 minutes later after collecting Gs insurance card, ID, etc. in her purse.


At the hospital the vital signs were good. 


After CAT scan and xray, the diagnosis was a mild concussion, a strained neck, numerous bruises, several scrapes and a broken thumb. The thumb will require surgery. The type of break was described as requiring "open reduction" surgery, or the complete term is "open reduction and internal fixation. " A pin or pins must be used to get the bone back together.

The hospital didn't have a specialist on staff at the time; that's what happens when one is injured with a holiday approaching. We were given a specialist to contact the next day, but that specialist has scheduling issues, so we were referred. The surgeon confirmed the problem with the thumb and gave G a new splint after inspecting the hand.

After all of this, G and I went to a local restaurant for a cup of tea.


We're currently waiting for the actual surgery to occur. No word yet. but it should be soon. Delay a few days isn't a bad thing, as it allows the swelling to reduce.

On the other hand, G hasn't had any food or drink since midnight. The surgery could occur today. She's getting hungry.

Monday, November 21, 2016

Trekking Again - No Time for Campgrounds


Bookmark and Share


Dawn in the rest stop
With the changing weather it was time to leave the Northland. We had two choices; go to the southeast, or to the southwest. We wanted to visit in the southeast, but this is holiday season and that can be stressful. Family, preparations, cooking, visitors and so on. We decided to delay the Southeast and head to the Southwest.

Before leaving we did want to spend some time with family and friends.  Our attempt to stage a pre-Thanksgiving dinner of smoked, baked ham failed because of everyone's schedule. Instead we arranged for several meals at restaurants (our treat) because we would be away for the traditional Thanksgiving and Christmas holidays.  These were small group dining experiences and provided for more intimate and comfortable discussions. One meal was at the Reel Club, where we treated G's aunt and her cousin. It was very enjoyable.

We discussed with friends to the east and we decided to delay our visit to the southeast until spring. So to the southwest it is to be.  I packed and decided there wasn't enough room for G. So I set out alone and she will catch up via air.

As to be expected for this time of year, the weather was changing. I packed all day. The water system was empty to lighten the load.  I filled the lower storage area, the rear storage area and the external slide bay. Then I filled the rear. I stacked containers and boxes neatly, filled all the compartments and then piled the soft stuff toward the front. I even filled the bathroom with soft goods.

No room in the rear
The full to the gills interior was expected and I planned to sleep in the front by rotating the front passenger seat and setting up a temporary bed; our Roadtrek is equipped with a folding mattress, which adds a sleeping area in the front, in addition to the king bed/dual twins in the rear.

I took off at 7:15pm. Five hours later I stopped at a rest stop, set up the bed in the front of the Roadtrek and quickly fell asleep. It had been a really long day. It was about 60F outside, but a weather front was coming and there was snow in the Dakotas. This pleasantry would not last.

The next morning I awoke at dawn.
Awake at dawn
After brief preparation off I went.  The day went smoothly until I entered western Missouri. At that time I encountered the front, with very strong wind gusts. I was driving west or southwest and so the gusts were head on at times or about 30 degrees off the starboard bow. As I travelled the gusts became worse and soon the wind noise was a roar. Semi's were fishtailing ahead. Now that a lot of wind. G called me to see how I was doing and she commented "What's that roar?" It was the sound of the wind. I think the combination of my forward speed of 65 MPH and the 35-40 MPH headwinds resulted in the equivalent of a 100 MPH wind. Mileage took a hit and I was averaging about 13.1-13.7 MPG. I could have slowed down, but I knew "a change is acoming" and I surmised any delay would put me in the middle of it. Temperatures were falling steadily. Driving was difficult and I had to keep both hands on the wheel at all times.

At a gas stop I checked the weather and it was going to be about 25F in Amarillo, TX that night. I decided to press on, as the temperatures would be even lower as I travelled further west.  Amarillo is at 3605 feet above sea level. It was going to be a clear night, and calm.

I arrived at Amarillo at about 8:00pm. It was late and so I decided to stay at an RV friendly gas stop, which G had checked for me and it was also on Allstays. But I wouldn't have power. I decided against running the generator. Not that big a deal for me; I had a polartec blanket, etc. and this would be a real camping experience. I slept pretty well. My Class B doesn't have much insulation and with the large glass area that's the largest heat loss. But I took the third seat back, put it against the wall and slept against it. That's about 3 inches of insulation directly next to my "bed." I ran the engine to heat the interior, put on my winter jacket, pulled the blanket over me and fell asleep. I awoke once and thought "Gee, why is so warm?" I had the blanket over my head.

I awoke at 6:00 AM; it was about 25F. I walked to the McDonald's and got a breakfast with large coffee and left to eat it on the road.

The wind had moderated as the front had moved through. It was dark. As I travelled I could see a thin line of pink in the color rear view camera. It would be another long day.

I arrived at my destination at 3:43 PM (4:43 PM Central). I had travelled 1,805 miles, arriving about 45.5 hours after I began.

That's not my ideal for travel, but I had a destination to reach and G was arriving via air in a day and a half. Then we would begin our winter adventure. BTW, the Eclipse radio/DVD/CD is really great. But the TomTom GPS is not as accurate as I would like. I used a different GPS (Verizon with real time traffic and condition updates). However, when trekking I have the TomTom "on" but with no route planned.

Here is the display at the time of my arrival:


Saturday, October 22, 2016

Homemade Freezer Thermometer


Bookmark and Share


In the TT we leave some things in the refrigerator. It is a absorptive two-way which uses 120VAC when available and propane/12VDC if AC power isn't available.  We leave the TT at a site unattended sometimes for a couple of weeks. But we don't empty the refrigerator and it is in the AUTO mode. We take all meat items or high spoilage stuff out when we leave, but condiments, bread, peanutbutter, soda, wine, frozen veggies, cheese, etc. are left cold.

We are counting on the refrigerator switching from 120VAC to propane/12VDC in the event of AC power loss. That has worked fine and will work as long as the battery and propane are available. However, there is always the possibility that something will go wrong.

We use a simple memory thermometer for the freezer. We filled a 3 ounce plastic cup with water and placed it in the freezer. We also placed a quarter in the freezer. This prepared the thermometer.


Several hours later, we removed the frozen cup and quarter. We placed the quarter on top of the frozen water. Then we put it into the freezer.


If the freezer begins to thaw, the ice will turn to slush and the quarter will sink into it. On return to our TT we simply check the freezer. If the quarter is resting on top then we know the freezer temperature has never warmed above 32F.

Sunday, October 16, 2016

The Final Summer Like Day


It is the end of the season. The Beach Bucket has closed and winter is approaching. Everyone is packing and those who aren't are preparing to winterize their rigs.


Bookmark and Share


Tuesday, October 11, 2016

Winterizing a Travel Trailer


Bookmark and Share


Nighttime temperatures are falling into the low 40s (7C) and so it is time for evening fires and to get ready to shut down the travel trailer. A friend recently purchased a TT and he is unfamiliar with what is required. I prepared this list, which is fairly typical:

What you need:
  • 3 gallons pink (potable) anti-freeze for RVs (Note 1). 
  • Disinfecting wipes
  • 2 boxes baking soda
  • Anti-mouse measures including dryer sheets and/or moth balls and Irish Spring soap, etc.
  • 1-1/16 socket for the hot water heater anode
  • Screwdrivers and #2 square bit (for many but not all trailers).
  • Wrench for battery connections.
  • Teflon tape for the hot water heater anode.
  •  Electrical tape for the battery leads.
Notes:
  1.  Many of the smaller (30 ft) or less travel trailers need only about 2 gallons of anti-freeze, so three gallons will provide some extra if required. Any leftover can be stored in the trailer for next year.
  2. The purpose of using RV antifreeze is to prevent water from freezing in the pump and water lines and bursting them. The hot water heater will be drained and left empty; there are three valves for accomplishing this (see steps #12 and #13). The fresh water tank will also be drained, but in general if there is some water in the tank that should not be a problem. In fact, it may be impossible to get every drop of water out of this tank.
Purpose: To prepare the rig for storage in cold weather.

Summary: This will require retracting the awning, retracting the slide(s), removing the fresh water hose, removal of black/grey sewer hose, stowing 120V electrical cable and power protection device, disconnecting the 12VDC battery and the removal of food stuffs and anything that might freeze from the trailer, preparing the refrigerator, draining the hot water heater and putting the heater valves in “bypass” mode, the draining of all fresh water from the system and replacing it with potable (pink) RV antifreeze.  Anti-freeze will also be added to the black and grey tanks, and to all of the P-traps. Anti-mouse procedures can include Irish Spring soap, moth balls and dryer sheets.  Or your favorite technique. 
Steps:
  1.  This assumes the trailer is level. This is necessary to assure that water in the hot and cold water lines will flow to the low point drains. It can take several hours to drain all of the fresh water from the trailer plumbing, so allow at least four hours to do this.  The order of some steps can be changed but sufficient time must be allowed for complete draining of fresh water from the system before adding anti-freeze.
  2. Turn off the hot water heater electrical switch if dual fuel (to get to this you might have to remove the exterior cover of the heater). 
  3. Turn off the hot water heater propane switch. This will usually be on a small control panel with other controls and tank level indicators. Do other things while it cools down. Or, open a hot water faucet and leave open until the running water is cool to the touch.
  4. Close the propane tank valves. 
  5. Empty the black tank and with the slide valve open rinse it, if it is equipped with a fresh water connection. Otherwise, put several gallons of water into the tank via the toilet and let the tank drain. Then close the dump valve.
  6. Empty the gray tank and with the dump valve open run water in a sink for several minutes to allow the gray tank and hose to get a fresh water rinse. Then turn off the water and after a couple of minutes, close the slide valve.
  7. Attach a non-drinking hose to the connection at the gray/black tank discharge and rinse the expandable hose for a few minutes. Then turn off the water, disconnect the fresh water hose, disconnect the expandable hose at the slide valves and drain into the dump. Then completely disconnect the hose and allow to air dry. Return after it is dry and disconnect any fittings and slide the hose into the rear bumper. Elbows can be stored in the under compartment of the rig.
  8. Turn off the fresh water fill to the trailer. Disconnect this hose to assure that no water is entering the plumbing of the trailer. You can drain and stow this after opening the various drains in the next steps.
  9. Turn off the water pump electrical switch, if it was “on”. 
  10. Open all of the low-point drains, which can be found under the trailer. There may be several (blue pipes are for cold water and red are for hot water). 
  11. Open the drain of the fresh water holding tank. Also open the outside fill connection to allow air to enter, and quicker draining. If you can’t get the drain plug or valve for the fresh water tank open, you can turn on the fresh water pump and open a faucet to drain it. 
  12. Open all of the faucet valves including hot and cold in all sinks, the tub and make sure the shower spray wand valve is open. Also open the hot and cold faucet valves for any outside shower. The purpose is to allow air to enter at these points so water will drain as completely as possible from the fresh water system. 
  13. Using the socket set, remove the anode from the hot water heater. CAUTION – avoid scalding water. See Steps #2 and #3. To speed up the draining, open the overpressure relief by pulling on the handle. Leave open and allow the heater several minutes to drain completely. 
  14. Go inside and remove the cover(s) which provide access to the rear of the hot water heater. There are three valves which need to be changed. 1) Close the inlet valve to the hot water heater (blue pipe). 2) Close the outlet valve from the hot water heater (red pipe). 3) Open the bypass valve, which is the middle valve connecting the inlet and outlet lines to the hot water heater. This is necessary because if not done many gallons of anti-freeze will be necessary to fill the heater tank. Leave the valves in this position when stored.
  15. Look near the hot water heater for the fill tube for the anti-freeze. This will be upstream of the water pump. In some rigs this is behind a removable panel beneath the refrigerator. This will be a short, flexible piece of tubing similar to the other fresh water lines, with one end open to atmosphere. It might be white in color. Pull the tube out of the cabinet. This tube will have a valve. This is the siphon tube for getting anti-freeze into the fresh water lines.
  16. Open the filter ahead of the fresh water pump and clean that filter. Then put it back together.
  17. The anti-freeze siphon tube is part of a “Y” which connects that tube and the fresh water line from the water tank to the water pump. One end of the siphon tube is open. That will be how we get anti-freeze into the fresh water system. The other part of the “Y” is a tube which is the fresh water line from the tank. That line will have a valve. Close the valve from the fresh water tank. 
  18. On the siphon tube there is a valve. Open that valve. 
  19. At this point you must wait until there is no longer any water flowing from the low point drains and the drain valve of the fresh water tank. 
  20. Once there is no longer any water draining from the low point drains and the fresh water tank drain valve, close all of these valves.
  21. Close all of the faucet valves both hot and cold throughout the RV. 
  22. Return outside and go to the hot water heater. Close the overpressure valve, clean the anode on a rag and after applying Teflon tape to the threads reinsert the anode and tighten with the 1-1/16 socket. If the anode is nearing depletion, make a note of the model of hot water heater so a replacement can be ordered over the winter. 
  23. Open a gallon of RV antifreeze. Insert the siphon tube into the container. Turn on the water pump. It will begin to run, siphoning the antifreeze. Go to the farthest point of the fresh water system. This is probably the outside shower. Open the cold water faucet. It should sputter as the pump draws antifreeze into the system. Wait for pink stuff to come out and close the cold water faucet. Open the hot water faucet. It will sputter as pink stuff is drawn into the bypass line around the heater. When pink stuff is flowing, close the faucet and return to the inside of the RV. 
  24. Check the remaining pink stuff in the gallon. Go to the next, most distant faucet. Probably the bathtub. Open the cold water faucet and wait for pink stuff to flow. Close the cold and open the hot faucet. Wait for pink stuff to flow. Then open the shower valve and let pink stuff flow through the shower head. Close the hot water faucet.
  25. Do the same for the bathroom sink. First the cold water and then the hot water faucets.
  26. Do the same for the kitchen sink, first the cold water and then the hot water faucets.
  27. Check the remaining pink stuff in the gallon. If there is enough go to the toilet. If not, open another gallon and insert the siphon tube. Then return to the toilet. Press the foot pedal and hold down until pink stuff goes into the toilet. Flush a little longer to assure that there is some pink antifreeze in the black tank. Release the foot pedal and pour a small amount into the toilet to cover the flush valve to lubricate for winter and prevent drying out of the rubber gasket. 
  28. Turn off the water pump switch. Close the siphon valve and open the valve in the inlet water line. Remove the gallon of antifreeze. Close up the cabinet containing the siphon tube.
  29. Take the gallon of antifreeze to the tub and pour a couple of cupfuls of antifreeze into the drain. Do the same at the bathroom sink. You want the P-trap to be filled with antifreeze. 
  30. Go to the kitchen sink and pour a couple of cupfuls of antifreeze into the drain.
  31. That completes the replacement of water with antifreeze in the system. 
  32. Remove all food from the refrigerator and freezer. Turn it off. Prop the doors open and allow the interior to come up to room temperature. Clean the entire inside with Clorox or similar disinfecting wipes. Allow the interior to dry. Open the Arm & Hammer baking soda and put one in the freezer and one in the refrigerator. Close the doors.
  33. Remove all food from the rig and all liquids. Ditto for all lotions and potions, toothpaste, etc.
  34. Put anti-mouse controls in cabinets, behind chairs and sofas, etc. 
  35. Close all of the roof vents.
  36. Close all of the windows and lower all shades or blinds. 
  37. If the TV antenna is retractable do that. If connected to cable outside, disconnect and stow the cable. 
  38. Check all interior and exterior water faucets to assure that they are closed.
  39. Re-arrange the furniture so the slide may be retracted. 
  40. Go outside and clean the roof of the slide(s) using a broom. Wipe and clean the seals with a damp cloth. 
  41. Return to the interior and retract  the slide(s). Retract the awning. Go outside to assure the slide(s) are fully closed. Check the seals to see that they are in position. In particular check the seals on the bottom exterior of the slide(s) to assure there are no openings by which critters could enter the rig.
  42. Go to the exterior of the stove vent fan and make sure the clips that lock it closed are in position. 
  43. Disconnect the 120VAC power to the rig. Stow the cable and power protective device. 
  44. Go to the battery box and disconnect the positive lead of the battery. CAUTION – avoid shorting or grounding the cables or the battery which is DANGEROUS and can result in damage or burns and other serious injury. Tape the exposed end of the electrical cable. If desired, remove the negative cable and tape the end. For the winter, the battery may be kept in a mild temperature location at home and if desired it can be put on a charger to bring it to full charge. 
  45. Tape over the outside vents of the furnace, if they aren’t screened (to keep critters out).
  46. Open the outside refrigerator compartment. Clean out any cobwebs, etc. Leave several dryer sheets inside on the floor. 
  47. Close and lock the doors, and retract the steps. Do a final walk around to see that there are no openings by which critters could enter the rig, all windows and vents are closed, etc. You are done.

Tuesday, October 4, 2016

The great Monarch butterfly migration


Bookmark and Share


The Monarch butterfly migration is underway. The swallows departed several weeks ago and they are being followed by the butterflies.

Getting photos of the Monarch's isn't easy. They don't travel when it is raining. They don't travel when the wind is blowing in the wrong direction. These cold blooded, fragile creatures persevere. So when the wind shifts and the air warms, they travel by us in a steady stream.

The storms left the area early this morning and by noon the butterflies were travelling. By sunset there was a steady stream, fluttering by and buffeted by the wind currents.


When the visitors are away, the turkeys party


Bookmark and Share


It is the end of the season and there are few visitors to the state park early in the morning. So the turkeys are out en mass.  Some are concerned about us and are on the fence.


They decide to flee.