This is our Trek in our Roadtrek 210P. Hint: Scroll to a list of "Topics and Destinations" on the right. Our RT is a portal to a much larger world and we have established "lily pads" from which we travel and we'll post about those, too. Life is a Journey of discovery in our Motorized Alpaca, a "tiny cabins on wheels". It has been said that "Life Begins at the end of our Comfort Zone." Content and photos are original unless noted. Click photos to enlarge.
Copyright and disclaimers apply.
7 Pages are shown on the Main Page.
7 pages are shown on the Main Page. To see additional posts, click on the link "Older Posts" at the bottom of the main page. For videos go to https://www.youtube.com/@normanretzke4377/videos click "skip" to avoid ads
G has a "swell" time kayaking
G has a "swell" time on Lake Michigan in an inflatable canoe
Originally posted on July 23, 2018
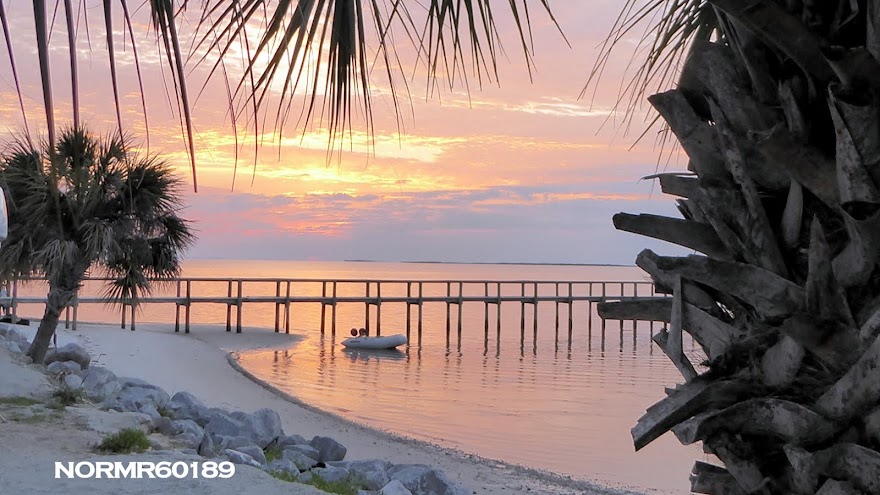
For more than 25 years, between Memorial Day and Labor Day, at the end of each day, "Taps" has been played live and in-person on bugle or trumpet at Weko Beach in Bridgman, MI.
We were able to visit at sunset and I videotaped the sunset and the playing of taps tonight.
The edited video; Hans Zimmer's score "Da Vinci Code", wind, waves and taps:
We trek in locations which have water and I've wanted a kayak or canoe for the two of us. I didn't want to leave G on the shore. Trekking with a rigid such thing attached to our 210P didn't strike me as a good idea. I did investigate a two-piece rigid kayak and discussed it with the owner of one at the lake. But I decided it was too costly and that transport, even in sections would be an issue in the Roadtrek.
Why a kayak or canoe? It's consistent with the very basis of trekking in our 210P. We chose a 210P to be unfettered. Yes, we can't go where there aren't roads, but otherwise we are free to trek as far as our gasoline leash will allow, and on road suitable for automobiles. However, upon arrival at the water, we had to stop. I wanted to go farther. I've owned and sailed several boats up to 25 ft, canoed 90 miles in a single trek in the Canadian wilderness and I was not to be stopped. However, I was delayed. It's taken four years to get here, but in the meantime I've set up two "lily pads" and trekked 30,000 miles in the 210P. This was while working. I also volunteer up to 1,000 hours per year. I'm a patient man with a vision and a goal.
The water is beckoning
I decided to investigate inflatables and I like the SE370 inflatable kayak sold by Sea Eagle. I like the dimensions, the weight capacity of 650 lbs and the inflatable, removable seats. These work well as beach seats, too. I'd guess the kayak hull weight less oars and seats is about 30 lbs. I did a fair amount of research and decided to purchase one. Folded it will fit beneath the bench seat of the 210P. It comes with a durable carry bag.
It went together easily, although attaching the retainers for the valves can take a while, but that's a chore that only has to be done once. I inflated it with the foot pump supplied. That took about 15 minutes and let it rest overnight to see if it had any leaks. One chamber deflated overnight (it has three main and two additional across the bow and stern). I tightened the valve where it attaches to the hull, inflated it again and it was leak proof.
The weather patterns the past month weren't conducive to kayaking on Lake Michigan with storms, E-Coli issues at the State Park beach and crowds on weekends. So we waited for an opportunity.
This weekend we beat the crowds and tried it out. It was a lot of fun and the inflatable seats are removable and work well as beach chairs.
Removed from the box
Assembled and ready for the water
We picked a day in which it was very calm, the water cool and the air temperature about 80F. I wanted to see how it handled with only boat wakes to worry about. The kayak is stable, handles well and is sufficiently light that I carried it inflated from the RT to the water. The two skegs help the trakking and I'm please by that. From the RT to the water took two trips. One with the kayak over my head and the second was with the paddles, seats and suntan lotion, etc.
G was a bit apprehensive and didn't know what to expect. But she had a good time and is looking forward to the next opportunity.
There are a variety of ways to keep cool when trekking in summer. Fresh water lakes are fun to swim in, but unless we can find shade, we'll have that RV cooking in the sun. I've created a variety of solar shades to help. This morning I finished the one for the lily pad (our cabin) next to the pond.
How I make these
I prefer Coolaroo Sun Shade. These are made of High Density Knitted Polyethylene. It is breathable and blocks 85% or more of the sun's UV rays. I sometimes paint to to give a little interest.
I may use vinyl cord for the edge.
Here's the sketched outline on the shade I painted today. I adjusted the brightness and contrast so the outline would stand out for this photo. I painted it while on the ground, and then hung it to complete the drying process. I use enamel:
Contrast adjusted to show sketch on fabric
Partially painted
Paint complete, hung to dry.
At times I get creative for the hanging method. This one is 15 ft. tall and has two pipe supports from above:
A few years ago I had a leak at the fresh water fitting of the toilet in the Roadtrek. That was primarily a nuisance because it is a wet bath and any water is contained within (unless it overwhelms the volume of the bath area and gray tank).
I solved that problem with a little TFE paste which is suitable for use on nylon fittings. I posted a video at the time about this.
Recently we had a slightly different and much more serious problem with a Thetford toilet. The fresh water valve failed to close. As is often true with "Murphy's Law" the problem occured at night, at the "most inopportune time". Gradually the toilet bowl filled and overflowed. We didn't hear it. In the middle of the night we discovered water was flowing out of the bathroom.
[Note: this post is not about the pluses or minuses of a Thetford. We like our "made in USA" Thetfords and wouldn't change them for anything. We have three rigs (two are Lily Pads and in all there are four Thetford toilets). In fact when we decided to change a toilet recently we went with a Thetford Aqua-Magic II. A contractor recommended another brand and we said "No". So I purchased and installed the toilet myself. $153.12, delivered price. ]
Now, unlike the toilet in a sticks n' bricks abode, RVs generally don't have a shutoff for the fresh water inlet to the toilet. So when we discovered we had a toilet fresh water issue I had to run outside and turn off all water to the rig. The water had to stay off until I could resolve the issue with the toilet. Of course, we could have turned on the fresh water pump when water was necessary but that too is risky. (Note: We did turn off the hot water heater "better safe than sorry" if the level in the heater fell.).
I decided that we needed a shutoff valve for the toilet. But that's easier said than done with such tight quarters. Not only is there limited space for a valve, there is also limited space to operate it.
I wanted something that would not require modification of the PEX piping.
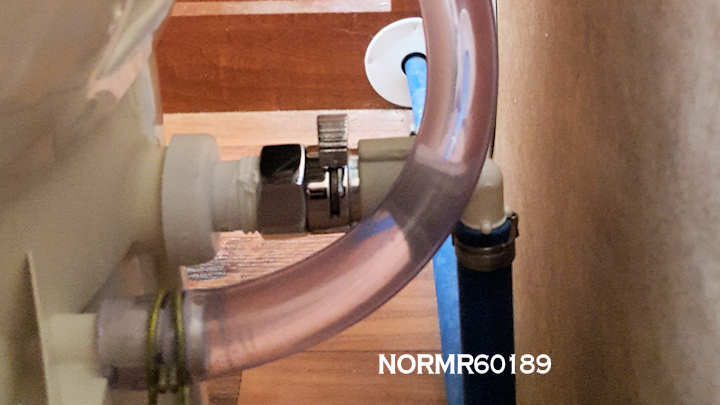
I did find a very small valve with an easy slide "off-on" feature and decided to try it. I decided it would be easy to operate in the blind, by touch and without the ability to observe the valve, and it is! Cost? $8.60. It is a "KES Shower Head Shut-Off Valve Ball Valve 1/2-Inch NPT BRASS Polished Chrome, KUS1140B"
Here are a few photos:
Toilet fresh water inlet - no valve.
Photo of the valve, to give an idea of the size
Suppliers photo of the valve.
Photo with valve installed. Fits well and works "wonderfully" and I don't have to see it to operate it.
Here's a link to the earlier video about a dripping fresh water inlet to the toilet in the Roadtrek; this was solved with a little TFE paste applied to the threads:
Our travel trailer, which is one of our lily pads, has a vent in the bedroom, but no fan. We get afternoon sun and decided we'd like a roof fan in that room. The vent lid was showing some fatigue and so I decided to:
Replace the vent lid.
Add a vent cover so we can leave the vent lid open when the TT is unattended. This also affords additional protection to the lid, keeps birds from moving in, etc.
Add a fan inside the existing vent. I chose a fan which is rated 188CFM and designed to retrofit within an existing 14 x 14 housing.
I have three vents, so I needed three vent lids and three covers to replace all.
I found replacement vent lids for about $19 each delivered so I purchased enough to do all three vent lids. (I purchased two sets of two because the price was better than buying three singles. So I now have a spare which I can give to a neighbor).
I also purchased three vent covers; two white and one smoke tint for about $28 each. I purchased one fan kit for the existing vent. The fan was about $59.
Total price each set of vent lid and vent cover = $47 each set.
Vent fan = $58.50
Labor: $0 (I'm free)
Wire, etc $0, from my hardware box.
The vent lid replacement was very easy. I did need G inside to open and close it on request for testing of the new one. Tools were a phillips screwdriver and a needle nose pliers. To remove the lid I removed the crank handle, the inside screen and the two screws holding the mechanism in place. That allowed me to open it fully from the roof and slide the mechanism off of the old lid. I put the mechanism aside, bent the tabs which held the vent lid in place and slid the old lid off of the full width hinge. I took the opportunity to clean the existing gasket and the screen.
The new lid went on in the reverse fashion. I slid it on and bent the tabs to keep it in place on the hinge. I then went inside the trailer and inserted the mechanism into the mating connector and screwed it in place. Then the screen went back and is held in place with two screws. Finally the crank handle was re-attached. Time to do this per vent lid was less than 30 minutes.
Each vent cover went on in about 20-30 minutes.
Clean up about 30 minutes.
The fan took a while because I had to drill an opening for two wires (I provided two #18 AWG per the fan instructions). I pulled the wires from an existing fixture to the fan location. I attached to the power of an existing light fixture for source of 12VDC. The fixture has two 1141 incandescent bulbs which draw a total of 3.06A. The fan draws 2.2A, I understand. With the dual fixture off, this circuit will draw less than the current draw of the bulbs. I may change this lighting fixture to LED bulbs to keep the current near the original 3A. The bedroom has three fixtures total with (4) 1141 12V bulbs, which is a total lighting load of 6.12A.
The fan is a 5 speed 3-forward and 2-reverse and is very quiet at the low and medium settings. We're quite pleased with it.
Fan in box
Out of the box - CAUTION don't hang the fan from the wires during installation. According to the manufacturer doing so will damage the fan.
Typical roof vent with the old vent lid removed. Note the mechanism hanging so could remove the lid. I've cleaned the lid gasket.
New vent lid installed
Wiring of existing lighting fixture -this will also supply the fan. CAUTION - make certain DC power is off before working on wiring. Note the interior of the vent lid is completely removed, so I could drill a hole and pull the new wires in the ceiling to the fan location.
After drilling a hole I fished the new wiring through, attached it to the existing lighting. The meter is to verify polarity before wiring the fan. I did install a split grommet to protect the wiring where it goes through the thin aluminum sidewall of the opening.
New fan completely installed. It went in place of the existing crank arm and the old screen. Most difficult part was aligning the new crank handle system to the existing lid mechanism while holding it up. G helped. The frame is the existing frame. CAUTION - Don't hang the fan from the wiring during installation. The manufacturer says that will damage the fan.
Aligning the vent cover with the vent. Then after placing the cover in place I marked the location of the brackets on the roof. No holes are required in the roof. The markings are to indicate where along the vent perimeter to place the brackets.
Four brackets installed and ready to place the vent cover in position. This is before cleaning the old gasket.
Close up of cover bracket. It is held in place with a 3/16 screw with washer, lockwasher and nut. The arrow points to the alignment mark I made when I positioned the cover over the closed vent. The mark indicates where to place the bracket before drilling the hole in the side of the vent frame.
Smoke vent cover over the new vent lid and fan
White vent cover over a new vent lid. I installed a total of three replacement vent lids and two vent covers.