7 Pages are shown on the Main Page.

7 pages are shown on the Main Page. To see additional posts, click on the link "Older Posts" at the bottom of the main page. For videos go to https://www.youtube.com/@normanretzke4377/videos click "skip" to avoid ads


G has a "swell" time kayaking

G has a "swell" time kayaking
G has a "swell" time on Lake Michigan in an inflatable canoe

Dawn on the Gulf of Mexico

Dawn on the Gulf of Mexico

Warren Dunes Sunset

Warren Dunes Sunset
Warren Dunes Sunset

Monday, February 27, 2017

Tire Carrier Surface Finish Issues - Rust!


Yakima Bike Carrier - No Rust after 10 years

Bookmark and Share


The photo above is not directly related to the issue with the tire carrier finish. But this is the best place to put it on the blog. I added this photo of the bike rack on the rear of the Roadtrek. It is a Yakima "KingPin 4" which can accommodate up to four bicycles.  We normally travel with two.

The Yakima shows no rust, after 10 years. It has a powdered finish and Yakima obviously does a great job. No rust of any kind on this bike carrier after about 11 years!

I purchased this adapter in 2006 for our Malibu Maxx and use it on both vehicles. I added a hitch adapter to match the hitch on the 210P to the 1-1/4" hitch on the bike rack. This moved the rack out.

As shown in the photo, I can open the right rear door of the Roadtrek with the rack on the Roadtrek. Very convenient.


Comments March 1, 2017:
  1. A reader suggested I consider using "Corroseal" which is a rust inhibitor.  Thanks for the tip, Wanda!  "Corroseal® is a water based rust converter combined with a non pigmented high quality latex metal primer. The converter segments turn rust into a barrier layer of black non rusting magnetite. The metal primer acts as a bonding agent for oil-based intermediate and finish coatings of epoxy, enamel, acrylic, polyurethane and moisture-cured urethane...."  http://www.corroseal.com/technical/technicaldata.aspx
  2. I used Rust-Oleum® Stops Rust® Rusty Metal Primer. According to the manufacturer this "stops rust and prevents corrosion. Apply to heavily rusted metal (use Rust-Oleum® Stops Rust® Clean Metal Primer on clean or lightly rusted metal). Bonds tightly to rust to form a surface top coats can adhere to."
Original Post February 27, 2017
The surface of the metal tire carrier on my 210P began to show some distress about two years after purchase. Paint flaked off to show rust underneath. This became quite extensive by the third year.

I really don't know what grade of steel, or surface finishing was used. It appears that there was no metal primer, but that is difficult to determine. Let's just say that the black paint and the primer were identical, because the paint flakes were black throughout, with rusty metal beneath.

I prepared the surface by cleaning with mineral spirits. I then used a stiff wire brush and a wire wheel to remove as much loose or flaking paint as possible, and also removed as much surface rust as I could. However, it would take a lot of grinding to get to polished metal. I also did not want to disassemble the unit.

Here's what it looked like after the first pass of cleaning. The first was by hand with a stiff wire brush, to remove as much loose paint as possible:


Here is how it looked after using the wire wheel with a 3/8 drill and before cleaning. Soon I'll be applying a primer:


After doing this I cleaned the surface again with mineral spirits, allowed to dry and then with a tack cloth. I did have to open it and flip it several times, and I used a wooden shim to keep it from closing (going to a 90 degree position).

I wanted to assure that all loose rust and paint had been removed. I decided against using a spray primer, choosing a brush-on "Rusty metal primer". I painted it partially on a table, let that dry overnight and then completed by sliding it partially into the center hitch of the Roadtrek:


I let it dry in the horizontal position, then closed it partially and that allowed me to paint other areas. I used a wooden shim to hold the hitch in position (shim removed for this photo):


I used brush-on black enamel as the final coat of paint. I used a shim to hold the rack in the partially dropped position. The arrow in the photo points to the shim, which is a piece of scrap with partially black surface:

Here's the finished tire rack. I didn't put a finish coat on the section that slides into the receiver; it will simply be scraped off when inserting it:


While I was at it, I painted the hitch parts on the Roadtrek that were showing some rust. Same procedure as the rack; clean, wire brush, prime and then finish coat.

We'll see how well this does. I hope it slows the rust down.


Wednesday, February 8, 2017

Coach Battery Replacement


Bookmark and Share


My Roadtrek which I could name "Tried and true" or "Rock steady" continues to perform. But there is maintenance to do. Some of this is preventative.

It became apparent that I needed to replace the coach batteries when one of them dropped to 0 volts. It had shorted, I guess, because the bank was at 6.5 volts, which was the voltage across one of the batteries and also the voltage across both. One battery seemed to be doing okay and the other was a tag-along. Just like America, 50% are doing the work and the other 50% is contributing nothing. beyond lip service.

I was aware that the batteries were not able to deliver the designed capacity. Capacity is the ability of a battery to provide the required power (watts) or ampere-hours for the required amount of time. My coach battery capacity prior to the 0 volt failure was below 50%, even though they measured suitable voltage on the indicator in the Roadtrek.

My batteries achieved a life of 4 years. Well maintained AGM batteries can go for 6 years, or more. I use a 50 watt solar panel with de-sulfating controller to maintain the batteries when off of the grid. My measurements indicate this is sufficient when storing the Roadtrek. On a sunny day the batteries will reach peak voltage. After a couple of cloudy days the voltage might decrease to about 80% as an indicator of "state of charge." I take my measurements early in the morning, prior to sunrise and after sufficient time to dissipate any "surface charge."


I'd done a lot of research including opening a discussion via the FMCA Roadtrek International "cyberrally" email.

I'd also designed a LiFePO4 system, should I want to upgrade to a lithium battery system. However, I decided at this time that going with AGM battery replacement was the prudent thing to do. More on that decision in a future post.

I was spending some time in the Tucson AZ area, so I found a distributor who carried the 220Ah 6-volt AGMs I was interested in and would install them for an additional $30. The total price was irresistible.


One thing we observed was the ends of the crimp connectors showed some oxidation. Is that a problem? The oxidation is higher resistance than bright copper, and over time that oxidation will creep up the wire. Resistance is a voltage loss and a source of heat. After cleaning, the ends were again shiny copper.


The installer then applied liquid plastic via a glue gun to seal the end of the connector. This should prevent further oxidation.


The new batteries included lifting means. One of the reasons I didn't do this was the fact that the old batteries didn't have such a means. I was faced with either purchasing a strap, or wrestling with 63 pound batteries. I've stored the lifting means in the compartment with the batteries.


Here's the completed installation:


After several weeks of monitoring the battery voltage, and with the solar panel connected, it seems the new batteries are doing well, achieving maximum terminal voltage and sustaining it into darkness.

My Roadtrek which I could name "Tried and true" or "Rock steady" continues to perform.

Sunday, February 5, 2017

Adding Interior LED Strip Lighting to RV


Bookmark and Share


We like the lighting of the 210P, which includes LED spots and fluorescents. But in the evening we wanted dimmable and "surround" light. So in June of [2015] I purchased and installed strip lighting.

I purchased a strip of LEDs 16.4 feet in length, with power supply, remote control and sensor for the remote. The cost was about $22 and today a similar strip can be purchased for less.

The first decision was where to mount the power supply. I could have gone direct DC, but decided on using the 120VAC supply that came with the strip. [Note: Some of the LEDs are designed for 12VDC and are intolerant of the higher voltages which can occur in RVs. I decided to use the AC/DC power supply which provides a stable DC voltage to the LEDs].

For the location of the power supply I had two easy choices. One location was above the entertainment center and the other above the kitchen galley. I chose the kitchen galley because it provided a better "line of site" for the remote.

As is true for all of my projects I determined what plugs into what before I attempted the install. I powered it up and confirmed operation on a tabletop. I also checked the length of the LED strip and how far it could reach. I'd made measurements prior to purchase, but the saying is "measure twice, cut once." This is before doing any drilling, etc. I had measured the length of the ceiling perimeter in the Roadtrek, The strip would reach from the extreme edge of the cabinet above the kitchen area, around the rear and to the armoire with about a foot to spare. I removed the plastic cover of the heat pump/AC so I could run the strip beneath it. The strip has a sticky back and adheres easily to the cabinetry.

Before installing I plugged it all together on a table and powered it up. I verified it all works before installing.

Here's the package:

Here are the electronics included in the package. Not shown is the remote or the spool of LEDs. This is a power supply and control module. The module includes a sensor which responds to the remote:

Here's the sensor that must have "line of sight" to the remote control. The sensor is one of the leads going to the white box in the above photo. The control included detailed instructions of what to plug into what, so I won't duplicate that here. The important this is this. The sensor must be installed outside of any cabinet so the remote will work.


Here's the second lead from the white control module. This lead goes to the LED strip. If you enlarge the photo you will notice a raised arrow. This must be aligned with a matching one on the mating connector of the LED strip. I needed to drill a hole large enough to accommodate this connector and the sensor.


Using a hand drill, I drilled a hole large enough through the cabinet to accommodate both connectors, but no larger than necessary so as not to reduce the strength of the cabinet. Here is what it looks like with the LED strip in place. The sensor was pushed into the hole from the rear and projects slightly into the room.

I also fed the LED connector through the hole and into the cabinet. It is probably easier to do the LED first. As I unrolled the LED strip I removed the backing about 3 inches at a time and pressed it onto the cabinet surface. The strip has a sticky back. At the heat pump/AC I removed the cover and ran the LED strip under it and around. It reached all the way to the armoire.


Here's a close-up. You can see the sensor projecting into the room:


Here's the cable and connector from the LED strip, Ready to install the control module and connect.

To get the strip around corners I used two techniques.  I used a razor knife to cut the plastic lens at exterior corners. This allowed for a sharp 90 degree bend. For interior corners I simply rounded the LED strip. Of course, I could have chamfered the inside corners, but I decided the benefits outweighed the time spent:


Ready to mount the electrical components:


Drilling the mounting holes for the screws to hold the electronic control module in place:


Connecting the LED strip to the control module. Be sure to observe the polarity markings:


Ready to mount the power supply:


I used sticky bases for cable tie-wraps to mount the power supply (See Note 1). These tend to loosen and perhaps one day I'll do this with screws. After mounting I plugged the power supply into the controller and into the AC outlet:


In the above photo, you will notice the sensor hanging in space. I simply pulled on the cable, drawing it back toward the hole. It projects about 1/4 inch from the front of the cabinet. Not noticeable,

Here's the remote:


Here's a close-up of the LED strip. It can be cut at the copper areas to shorten it, but I chose not to:


Here is the same strip illuminated as "white" and at maximum brightness:


Here we are, at night with the strip set to white light and moderate intensity:


Notes:
Per reader question. The "sticky base" I used for the cable ties is a square plastic mounting base with foam sticky backing. The cable tie can be threaded through this. These bases tend to loosen under high heat when attached to non-smooth surfaces (>90F per my experience). See the photo:


Saturday, February 4, 2017

Onan RV Generator Set

Onan Circuit Breaker


Bookmark and Share


Originally posted at http://roadtrek210.blogspot.com/
Scrolling to the bottom will reveal a copyright notice. There has been such a notice on this blog since the original date of inception in 2013. All material on this blog is copyrighted by me or the respective owners. Copying it and placing copied files on Social Group websites is prohibited...

The original blog includes disclaimers, etc. See the end of this post for a copy of those disclaimers....


Update September 5, 2021:
Added troubleshooting information.

Update April 5, 2018:
Added power decrease information for altitudes above 500 feet (163m) above sea level. Updated miscellaneous info and added air filter photo.

Comment added February 1, 2018:
Over at a FB group: "Onan update: ok... so went to check oil level this morning and low and behold there is oil all over driveway........... Matthew at Roadtrek said one should not drive while running generator.... I was told that was good way to exercise it and not disturb my neighbors."

Here's my comment: "I know it is inconvenient, but Onan recommends a physical inspection of the generator before running it. While that may be unrealistic given the under mount, frequent inspections (or at least once a month before that two hour exercise) might be prudent."

Original Post, updated:


Oil fill cap and dipstick - Loosened to show threads

Our RT included the optional gasoline powered Onan 2.8 kW generator set.  I'd read some negative comments about generators in RVs, including Roadtreks. At one time the president of that company stated that the generators were their number one maintenance issue, or words to that effect.

I was concerned. So I read all of the Onan-Cummings documentation including the "Operator Manual" and "Installation Manual" and I decided to follow all of the recommendations. One concern I had was changing the engine oil. The generator is mounted under the vehicle and seemed to be difficult to get to. It really wasn't that difficult and this post includes photos of how I did it. 

I have also obtained a copy of the "Onan RV Genset Service Manual KV KVC KVD".  I've read and studied them all. 

This blog indicates that I can do some basic service tasks. For example, I have been able to do my own engine oil changes. This wasn't as difficult as I expected.  In fact, my experience with this generator has been a very good one for 5-1/2 years, as of September 2021. I do exercise the generator about monthly, I do check the oil level and I am inclined to replace the oil level at a shorter interval. I view the intervals for service in the manuals as the "maximum".  That's my perspective and I do realize others think these are merely "suggestions".  

I'm not yet at 150 hours, but I will be replacing the air filter in early 2022 and I'll probably replace the fuel filter and the spark plug at the same time.  I'm a "preventative maintenance" advocate because I really don't like breakdowns.

Here are some Onan recommendations for my generator set, which is a model 2.8KVFA26100K "IMPORTANT - Refer to your genset manual for the "official" manufacturer's recommendation for your genset. This does not relieve you of the responsibility for proper maintenance of your genset."
  1. The gasoline powered generator on my Roadtrek should be exercised two hours per month. Onan states that a two hour continuous run is better than several short duration runs. 
  2. Onan states that the generator should be exercised with a half load. 
  3. Onan recommended a "break-in" period with specific instructions. I followed them. The Onan manual is very specific about loading and oil viscosity during this period. 
  4. Onan recommended single weight oil over multi-viscosity. However, it also recommended several different oil viscosities as determined by minimum and peak ambient temperatures. 
  5. Onan recommends a gasoline additive. 
  6. Onan recommends an initial oil change at 20 hours, and thereafter at 100 hours, unless used under dusty conditions. In dusty conditions the oil is to be changed every 50 hours. 
  7. Onan recommends a general inspection every day of use.
  8. Onan recommends checking the engine oil every 8 hours of use. 
  9. Limit the cranking time with specific duration pauses. 
  10. Set the "altitude adjustment" to match the current altitude. 
  11. Onan recommends "Before the first start of the day....inspect the genset as instructed under CONDUCTING GENERAL INSPECTIONS..." I do as that list recommends. Actually easy.
I've followed Onan's recommendations, with one exception.
  1. I don't change the altitude adjustment from day to day. More on that later in this post.  
Some things I do which might contribute to my [good] experience:
  1. I followed the "break-in" recommendations.
  2. I add "seafoam" gasoline additive to the RT210 tank. I do this during fill-up when I expect to run the genset on that tank of gas. I purchase the seafoam in a large, one gallon container to save money. One gallon has made it for three years.
  3. I do exercise the generator frequently and attempt 1-1/2 to 2 hours per month.
  4. I do use the recommended oil viscosity and per Onan's manual I use single weight oil where practical.
  5. I change the oil with seasonal changes, whether I've reached the number of hours or not. I travel from below freezing temperatures to 100F with the anticipation of using the generator. 
My longest period using the generator was overnight in New Mexico with a low of about 25F. I ran it all night. Not a problem. The only issue I have experienced to date (since December 2013) was running it to exercise it at temperatures below 20F. It did start, but it had the "break in oil" in it which might have contributed to the reluctance to start.

Why exercise the genset drive? 
The manual for my Onan generator set states "Exercising the genset drives off moisture, re-lubricates the engine, replaces stale fuel in fuel lines and carburetor and removes oxides from the electrical contacts and generator slip rings. The result is better starting, more reliable operation and longer engine life." (emphasis is mine).

Reaching the genset to do maintenance
Of course, to change the oil or to set the altitude adjustment requires getting to the genset. In my case it is mounted under the vehicle.  Initially I tried to do this in cold weather while wearing a moderate weight coat. It didn't seem possible. However, by removing the coat I was able to easily slide in from the side of the vehicle. Here is what I determined:
  1. Wear light weight clothing.
  2. Put a "blue" fiberglass tarp under the rear of the vehicle. This is "slippery" and makes it easy to slide in or out on one's back and with little effort. 
Troubleshooting, per Onan Service Manual
The following does provide some ideas about possible causes for common problems. For complete details, including diagrams and corrective actions for these and other problems, refer to the Onan Service Manual. Onan Factory WARNING: "Many troubleshooting procedures present hazards that can result in severe personal injury or death. Only trained and experienced personnel with knowledge of fuels, electricity, and machinery hazards should perform service procedures. "

1. Engine does Not Crank:
  • Open control fuse F1.
  • Insufficient cranking voltage.
  • Start solenoid (K1) not energized.
  • Starter (B1) not energized.
  • Will engine crank from the start-stop switch mounted on the generator?
2. Engine cranks but does Not Start:
  • Restricted fuel supply.
  • Faulty ignition due to worn or fouled spark plug.
  • Sticking choke or carburetor mixture screws incorrectly adjusted.
  • Fuel pump (E2) not working.
  • Governor linkage stuck or binding.
  • Oil level switch (S2) closed due to low oil level or defective switch.
3. Engine Starts But Stops When Start Switch is Released:
  • Low oil level.
  • Defective low oil level switch. 
  • No field flash voltage.
  • Defective generator, control assembly or voltage regulator VR1.
4. Engine Starts and Runs, Then Stops. Generator Set Immediately restarts or after Cooldown:
  • Fuel level is below genset set fuel pickup tube (about 1/4 tank).
  • Oil level is low.
  • Faulty choke operation. 
  • Vapor lock from high ambient restrict airflow. 
  • Contaminated or incorrect fuel. 
5. No AC Output. This may cause Generator to stop when Start Button is Released:
  • Open circuit breaker. 
  • Open circuit between stator connections Q1 or Q2 and voltage regulator.
  • Open circuit between battery Pos. (+) and voltage regulator pin 7 for field flash.
  • Brushes not making good contact. 
  • Slip ring surface is rough or pitted.
  • Capacitor C1 shorted.
  • Defective generator, control assembly A1 or voltage regulator VR1.
6. Engine Runs Rough:
  • Dirty air or fuel filter. 
  • Contaminated fuel.
  • Lean fuel mixture.
  • Faulty ignition, due to worn or fouled spark plug or ignition wire.
  • Carburetor icing.

7. Engine Lacks Power:
  • Dirty air filter. 
  • Restricted fuel flow.
  • Exhaust system blocked or restricted.
  • Carburetor air preheater set incorrectly.
  • No load speed set too low.
  • Incorrect fuel mixture.
  • Incorrect valve lifter clearance or worn valves.
  • Excessive engine wear.

8. Engine Hunts or Surges:
  • Fuel supply problem.
  • Incorrect fuel mixture.
  • Governor problem.
  • Carburetor icing.
9. Engine Shuts Down and Will Not Restart:
  • Low oil level.
  • Low oil level switch defective..
  • Worn spark plug.
  • Flooded fuel system.
  • Choke not opening.
  • Faulty ignition system.
10. Engine Runs on After Shutdown:
  • Fouled spark plug.
  • Engine carbon build-up.

Changing the oil or checking the oil level
This is relatively easy in my 210P. There are two slide "tabs" which hold a removable access cover in place. Pushing them both up releases the cover. This provides access to the "oil fill cap and dipstick."

Removing the cover also provides access to the "altitude adjustment."

Tools required to change the oil in my genset:
  1. 14mm socket set
  2. Torque wrench 21 lbs-ft (27 N-m) if available. 
  3. Small crescent wrench (less than 6 inch); OPTIONAL
  4. Small plastic funnel
Why the crescent wrench? I couldn't get enough torque with my left hand to rotate and loosen the "oil fill cap and dipstick." So I gentlyused a small 4 inch crescent wrench to provide some leverage. But that's a plastic cap, so I had to be careful.

Onan oil recommendations - Check your manual before selecting

Onan Recommendations per the manual for my Genset


Steps for oil change (see photos):
  1. Run the genset as recommended by Onan to heat 
  2. Slide the access cover latches up. CAUTION. Some components will be hot!
  3. I first remove the "oil fill cap and dipstick." I do this because if I first dump the oil and then have difficulty and can't remove the oil cap, I'll have a generator with no oil. I would be committed and unable to run the genset until I found a way to remove the oil cap and add the required oil. Of course, accidentally running a generator without oil is a certain means of destruction. 
  4. Then I place a 1 quart container under the "oil drain plug." An old coffee container works well.
  5. Loosen the "oil drain plug" and let it flow into the container beneath.
  6. After the oil has drained tighten the drain plug (recommended 21 lbs-ft (27 N-m) per my Onan manual.
  7. Insert the small plastic funnel.
  8. Gradually pour fresh oil into the funnel until the proper amount is in the generator. In my case, 1 quart of 30W for temperatures "32F (0C) and higher." All according to the Onan manual. 
  9. Insert the "oil fill cap and dipstick" and confirm the oil level is proper. 
  10. Tighten the  "oil fill cap and dipstick."
  11. Replace the access cover.
  12. Dispose of the old oil responsibly. There are numerous recycling options available.
Altitude adjustments and Power versus Altitude
Onan states that power decreases at higher altitude (this is per their manual):

  • Up to 500 feet (162 m) above sea level = 2800 watts (rated power)
  • At 2500 feet (762 m) = 2604 watts
  • At 5500 feet (1676 m) = 2310 watts
  • Above 5500 feet = 2310 watts decreased by 98 watts for every 1000 feet (305 m).

Onan recommends setting the adjustment for the current altitude. I've left it in the position originally set by the Roadtrek factory, or the manufacturer. My bad? I've never use it above 4500ft or lower than 300ft above sea level.

Photos

Onan nameplate - This is the model that is in my Roadtrek
Oil fill cap and dipstick, after loosening

Oil drain plug

Loosening the oil drain plug

Draining the oil
Oil draining into the coffee can
Oil fill point, with "oil fill cap and dipstick" removed
Plastic funnel inserted into oil fill point

Altitude adjustment

Air filter (Onan manual recommends "perform more frequently when operating in dusty environments":


Disclaimer

This blog is my gift to you. I do have some google ads here, but the blog posts are entirely by me. So enjoy! The web provides information, entertainment and dis- or mis-information. That's reality. My posts include my experiences and yours might be different. With these differing realities, you must be aware of the following:

By using this web site or any information referenced thereon, you agree to release and hold harmless Roadtrek210.blogspot.com, its contributors and representatives from any liability. Any products, materials, procedures, and all information, advice and instruction are given as general guidance only. All safety instructions on products should be followed. The material is distributed "as is," and no express or implied warranties of any kind are made, including, but not limited to, fitness for a particular purpose.

Roadtrek210.blogspot.com (c) 2021

Wednesday, January 11, 2017

Living in "Candominiums"


Bookmark and Share


"Living the RV Dream, "Full Time RVing", "RV Boondocking", RV Solar Living" "Fifth Wheel" living, "RVers on the Road" and the list goes on.

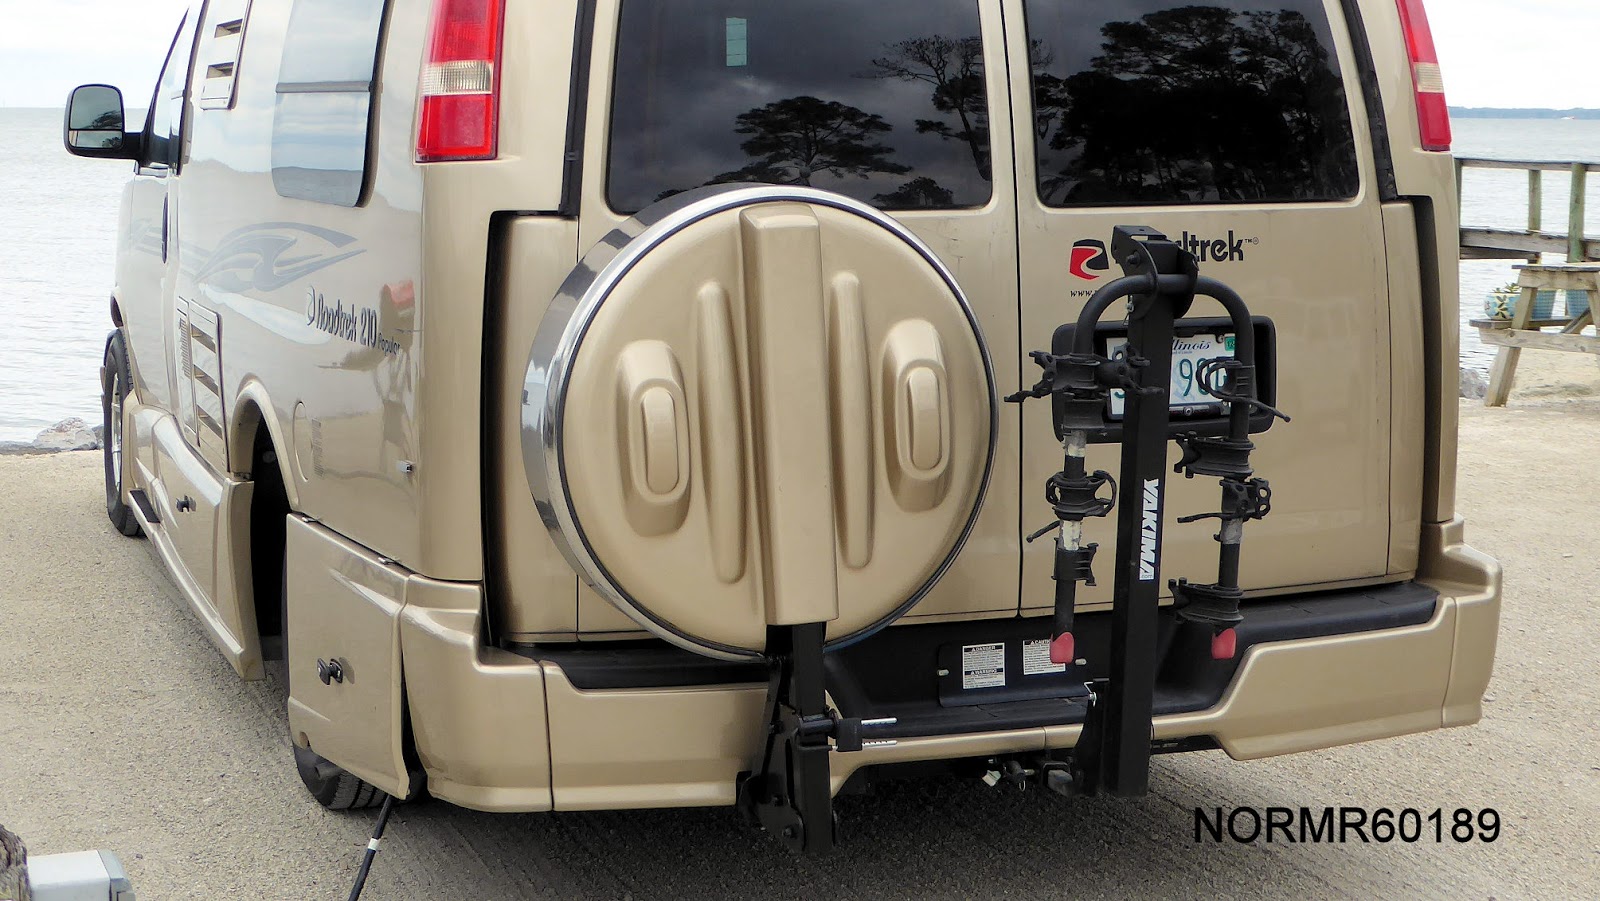
There are many expectations for RV living and lots of social media groups which provide insights and opinions. There are also many ways to live the RV lifestyle, as many as there are RVs on the road.  This is not a "one size fits all" situation. For example, we trek in a Class B (Roadtrek 210P). Since December 2013 we've trekked nearly 22,000 miles in it with some treks of up to 110 days (90 days interrupted by an overnight hotel stay in Bisbee AZ). We think of the 210P as our mobile motel room and our gateway to the outdoors. It is very comfortable. But we have friends who simply cannot grasp why we would do this. Some are tied to their abode and the big city they live in. Others have tried country living and hated it; (think "Green Acres"). Others had a short RV experience with their children in tow and after about two weeks in a metal can had enough of the "camping" adventure.  Some need the internet and cable TV and don't want to pay the price to get these on the road. And of course, some have work, job or family commitments and simply can't get away.

Obviously, this lifestyle is not for everyone and there are different lifestyles to pursue. That is my point. For every hearty endorsement of the RV lifestyle and experience, there may be an opposing view. Which is why there is a "full time RV Hell" social group.  Which makes me wonder. RVs are mobile and so if one doesn't like their current location, then move on. If the rig is a piece of junk, then move on.

Some call their rigs "tiny homes" and some call them "candominiums."

Flexibility is Helpful
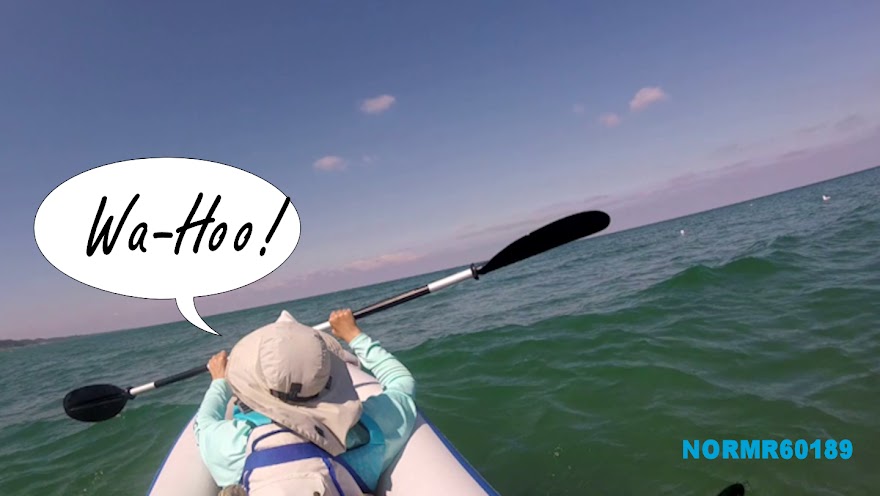
We've taken a somewhat flexible approach and while it seems there are periods of imperfection, it is also true that everything is "perfectly imperfect." Yes, it can be darn good. We do enjoy the great outdoors, truck stops, resorts, National Parks and meeting new people. We also enjoy a lot of space. That might seem oxymoronic, because our Class B is such a tiny, tiny home. However, when we open that side door we step into the great outdoors. In fact, that experience is what convinced G that she really wanted to do this. She tells me she'll never forget opening the side door on a trek through Canyonlands National Park and looking at the vista. We were in a small area legally adjacent to the road and overlooking the canyons. We were enjoying lunch. We had a vista of at least 15 miles with no one in our view; just the canyons and bluffs to the horizon.

Hiking in Canyonlands National Park
Canyonlands at Sunset - don't step back!
On the edge at Canyonlands, contemplating the far horizon
Open that side door at 5:30am as we did one morning and we had a different experience, at 9F. When we encounter such experiences we are usually just "passing through" and there is better weather just over the horizon. If not, we then continue moving.


We found better weather and when the day was done we retreated indoors and had another comfy night.

We can choose where and when to stop. We're not locked into any one location. Nevertheless, we do camp in weather extremes. I do think we've pushed the limits in the Roadtrek with outdoor temps from about 5F to over 100F and some really long treks. Some might consider this "extreme RVing" as one person described our approach. Furthermore most RVs are not designed for full time living. That requires some tolerance and understanding on the part of the occupants. Not everyone is going to be satisfied with RV living.

There are Differing Experiences
Some of us aren't ready to live this way, and each vehicle may provide a different experience. We tried a 19 foot Sprinter based rig with solar and all electric (no propane). We did this because we wanted the experience before making a purchase decision for any RV. We decided it wouldn't work for the longer treks we were planning and to the locations in mind. How long? 3 months or more. On the other hand, even the 19 footer was luxury compared to the backpacking and ground camping I've done. Back then it was a sleeping bag and a plastic potty bag inside the tent when it was really cold outside. The slogan while packing and planning what to carry was "an ounce in the morning is a pound at night." Today we can bring BBQ, lawn chairs, stuff the 5 cu. ft. refrigerator, carry sufficient supplies for weeks and so on. It has been a very different experience in the RVs.

My personal history influences my perspectives. I've lived for months on end in a variety of motels. This was required by my work. For one project I lived in a motel for 11 months. For another it was 5 months. Then there have been dozens of trips of 30 days or so and even more of 5 days or so. My first such business trip was 50 years ago. My next will be in a few weeks. While motels come with clean towels and daily service, I still prefer the Roadtrek and I do much of the cooking, etc.  We use a convection/microwave, a propane range, propane BBQ and an electric induction burner with cast iron. We have multiple heat sources including a heat pump, propane furnace and electric heater. There is an air conditioner for summer, and a two fans for ventilation and cooling.

However, living in a our mobile motel room does have challenges. I've written of this before. Every time one opens the door the elements come in. Do that in a driving rain and the humidity inside will become higher than that outside. Class Bs have a lot of glass and that glass has an R-value of about 0.1, which is almost nothing. Even Reflectix has an R-Value of about 1.0 or ten times better.  If your rig has solar panels then you will be parking in the sun to get that wonderful bounty of "free" energy. That's fine at temperatures below 75F. But as the temperatures rise that rig becomes a sauna.

A Hybrid Balance
We have taken  a hybrid approach. We follow the sun, hopping from home bases, which are stationary rigs positioned in AZ and MI. One is at a small campground in a wonderful area on the eastern shore of Lake Michigan. We're 2 hours from Chicago, or can easily go the the UP. The other is in a resort community in a winter area we decided we really like. These are our home bases and we can come and go as we please. There are other approaches. One can also own a condo and use it part time, or rent it to others with the anticipation of someday returning to a fully stationary lifestyle. We are currently hedging our bet with a condo.

However, if I wanted the absolute lowest cost with some amenities, I would seriously consider a Casita travel trailer or similar. The 16 foot  Deluxe has a dry weight of just over 2,000 lbs. It can be towed by just about any vehicle with a Class II hitch and is comfortable for two, but can sleep up to six. One can park it just about anywhere and that means cheap living.

We opted for a B because we wanted a self contained unit, something we could drive everyday if we wanted to. I do admit at 21 ft. our rig is pushing the limits and it does stand out. Not exactly stealth trekking. But is has a lot of space and all of the amenities we required for trekking 90 days at a time.

For full time vehicle use, a 19 ft. Class B is probably optimal, but there are serious space compromises.

"Candominium" Living
We don't want to live in the Roadtrek full time. So what choices are there? One can find a resort with used Park models. These are really "tiny homes" and we did consider that. These are permanent and require renting a site for an annual fee. Some are really lovely with expansive covered decks, air conditioned adjacent rooms (insulated prefab buildings) and so on. Some have space for a small RV too. However, resorts do have rules about one RV only on a site. They don't allow two occupied RVs in a location designed for one. A Class B which can be used for daily travel is acceptable at such resorts.

We checked out a number of used Park models for sale. We can see why this is a popular approach. These predate the 'tiny home' movement by about 40 years. They are in many ways superior to some of the tiny homes we've seen.  One drawback to the Park model is they are not really "portable". The possible issues for a Park model include:
  1. Age restrictions in the community (55+, for example)
  2. Age demographics (A 55+ community may have a very large percentage of those aged 80)
  3. Resort finances (A resort may have financial issues)
  4. Rules and Regulations (These may be restrictive and not to your liking)
  5. A lack of mobility (If you decide you would prefer to move to another resort, you will have to find a buyer for your Park model).
Of course, one can always purchase a travel trailer (TT) or a 5th wheel and put it on a site. That mitigates many of the problems of a Park model; if one decided they would prefer another resort, they can have their RV hauled elsewhere even if they don't own a truck.

Continued in Part 2