7 Pages are shown on the Main Page.

7 pages are shown on the Main Page. To see additional posts, click on the link "Older Posts" at the bottom of the main page. For videos go to https://www.youtube.com/@normanretzke4377/videos click "skip" to avoid ads


G has a "swell" time kayaking

G has a "swell" time kayaking
G has a "swell" time on Lake Michigan in an inflatable canoe

Dawn on the Gulf of Mexico

Dawn on the Gulf of Mexico

Warren Dunes Sunset

Warren Dunes Sunset
Warren Dunes Sunset

Tuesday, January 12, 2016

More Cooking Gadgets - Microwave Containers for Leftovers


Bookmark and Share


We have two other things we use for cooking which we've found handy.

Here's one. It is a Bento style square box. Actually two, stacked with a handy flexible strap. These are small, have silicone tops with vents and are designed for leftovers and reheating in the microwave. In a 5 cu. ft refrigerator these fit nicely. Pop the vent to microwave, and the manufacturer recommends drying the outside before turning on the microwave. Recommended maximum 500 watts for 1 to 1-1/2 minutes. Thats for leftovers stored in the refrigerator, not the freezer.

On our 1500 watt High Pointe convection/microwave, that would mean a power setting of "PL3" which is about 450 watts. To get to this setting we press the "POWER" button multiple times, First time gives us PL10 which is 100%. Press again for PL9 which is 90% and so on.

Once we are at PL3 we press the number buttons. For example, pressing 1-0-0 in sequence gives one minute of cooking time (1:00). The press the "START" button to begin cooking.

The manufacture of the MB Squares recommends letting the box rest for a minute or so before eating. The food will continue to cook even when out of the microwave.


Next: The Lekue Steam Case

Monday, January 11, 2016

Cast Iron Grilling


Bookmark and Share


We've added another piece of Lodge Cast Iron to our trekking kitchen.

This is our third piece. It is about 10.5 inches square and fits perfectly on our inductive burner.


This cast iron piece has both grilling and griddling surfaces. We are looking forward to using it for pancakes. 

Here is the initiation with a ribeye steak. 


Sunday, January 10, 2016

Broke the Ice - First use of convection oven


Bookmark and Share


We were planning on outdoor cooking but the weather turned cold. That's not really a problem and I BBQ in cool to cold conditions all of the time.

However, then we got driving rain and I decided that this was the perfect opportunity to try the convection oven feature of the High Pointe combination convection oven/microwave.

I'd marinated the chicken for about an hour at 45F and decided to proceed.  I had a hard copy of the manual and also a pdf copy on my PC. I wasn't sure about the difference in function between the "CONVEC" and "ROAST" buttons but I decided to begin with the "CONVEC" and sort it out later.

I also used a meat thermometer. I don't like taking chances with raw foods, meat in particular. This would also provide me with an opportunity to determine realistic cooking times.

I determined that the roast feature is 30% microwave and 70% convection. I used that to finish off the chicken after about 20 minutes in the oven. Worked well.

I made a short video:


Thursday, January 7, 2016

Whew! Finally Getting Settled in 702 cubic feet


Bookmark and Share


Preamble: The following paragraphs will address the subject matter. But first, it has been a very busy several months. Normal business, trekking, some family in turmoil and so on. I've been extremely hampered in my online activities. Limited wi-fi for a few weeks, the high cost of Verizon hotspots via the jetpack and so on. Also limited time. What time has been available on line has been absorbed in doing tasks remotely. Even the home state updated their business tax filing website and procedures. I've had to go back and forth there finding all of the eccentricities of the updated site and providing the information now necessary, simply so the company can file the necessary tax documents. Apparently providing officer data is no longer sufficient. Early this morning I was filling in yet another online form. Is this the final one? Who knows.

Living in a really tiny house on wheels
Getting settled means working within the amenities of a really tiny home. I enjoy reading the purported travails and concerns of those contemplating a tiny house. Such a house is supposedly 400 square feet or less. Some say it is any house between 400 and 1,000 square feet. The question those contemplating such an existence include "Will it work?" and "How will it work?"

For anyone who wonders about this, I suggest they rent a small class B camper van and live in it for a few weeks. I'm not a van dweller per se. However, my Class B provides a useful 120.25 square feet inside floor area. Inside living space is about 702 cubic feet. The interior useful dimensions are about 18ft  x 6 ft-6 inches x 6 ft. That makes a 30 foot travel trailer seem like a mansion. Our space is larger than some of the alternatives, including 19 ft. Sprinter vans and 19 or 17 ft Chevy van based Class B's. Ours is a "wide body" but that is somewhat misleading. It is not a Class C. That choice was deliberate as we can drive this thing just about anywhere there are good roads and can park it in most parking spaces, with some overhang. We don't go where the roads are poor. I'd never go off road in a 2 WD vehicle. Even a 4 WD has risks. A lot of people find out when they bend the frames of those "offroad" pickup trucks.

Now, small is not necessarily an impediment. Let me provide some perspective. I once lived in a Holiday Inn for 5 months. My personal record for living in a motel is 11 months. I frequently spend 15 to 30 days living in a motel while I perform the final phase of the work required by my clients. My first long term motel experience was in 1969. A small motel room is larger than the B, but it does not provide the kitchen I currently have.

However, figuring out how to make it all work can be both fun and challenging. Making good meals in such a small space is not the easiest thing to do. It requires that one adapt. and adapt I have.

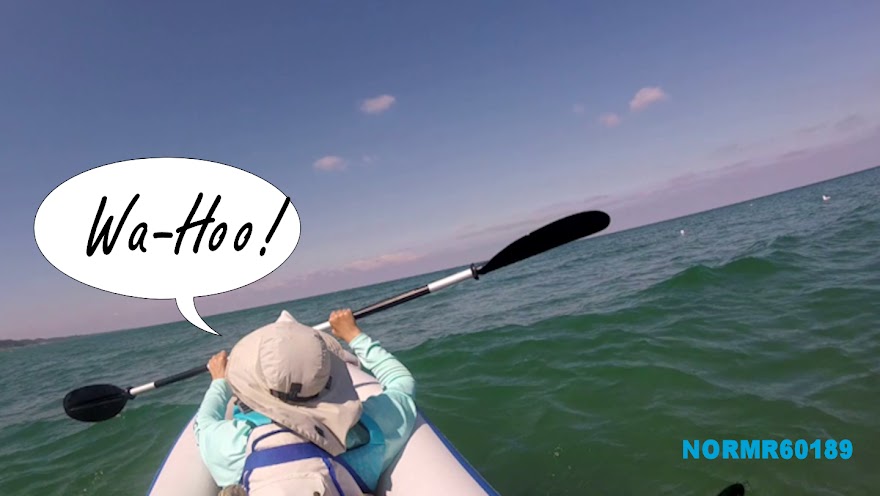
Now, one might ask "Why?"  I have an interest in living well, and in moderation. I also want to see all of the things I drove by for all of those years. Life is short. I have very limited time given to me to do what I intend and to see what I want to see. One can only wait so long and then we discover our physical being is not up to the task.Trekking this way is my version of having it all.

What does "living well" mean? That's a personal question. Let me simply say that one should set goals, have reasonable expectations and then put in place the things necessary to reach them. That's what I've been doing for a couple of decades. Prior to that it was about acquiring the necessary skills, taking reasonable risks, dealing with failures and making choices.

Living in the "Tardis"
If I ever name this Roadtrek it will be the "Tardis" because like Dr. Who's time & space machine, our 210P is larger on the inside than on the outside. It has taken 24 months and 16,000 miles to get to this point with a list of tweaks and improvements. We continue to learn, apply what we learn and make further improvements. Those improvements simply adapt this wonderful machine to our personal lifestyle. This is not a cookie cutter existence.

Living really tiny requires making choices. However, that doesn't mean we are overly restricted. I will say this. Anything smaller than this 210P would not work for us but as a weekend vehicle. We made a good decision with our purchase and are quite satisfied with our choices. What does it take for us to be living "really tiny?"
  • We like having two living/work spaces without infringing on the kitchen area.
  • We like three seats up front (the captains seats swivel to the rear when stationary). 
  • We like the front work area and the rear work/relaxation area. Currently I'm typing this up front and G is practicing the ukulele in the rear. 
  • We like a kitchen area which can accommodate the scratch preparation of small gourmet meals; it has ample counter space and we can use the propane range, or an inductive top or both. We like the larger cooking and food preparation area. 
  • We like having a larger (5 cu. ft) refrigerator.
  • We like having a microwave/convection oven, and it is at eye level. 
  • We like having most of the daily stuff above knee level, and that includes the refrigerator and microwave. 
  • We like having a heat pump, a propane furnace as well as 750/1500 watt electric ceramic heat. Oops, let's not forget the air conditioner. With an electric dual control blanket we are toasty in cool and cold weather. 
  • We like the dual fresh water tanks. We have running water even when the outside temp dips below freezing at night. As recommended we keep the hot water heater on at night when sub freezing nighttime temperatures occur. However, if we are anticipating below freezing day and night then we winterize. 
  • We like lots of daylight, but also appreciate our privacy and that hard shell.
  • We like the outdoors and do a lot of picnic meals and BBQ, But we also appreciate sufficient insulation and amenities to allow us to enjoy life with outside temps of 0F to 100F. 
  • Inside plumbing with hot water is a necessity. 
  • The outside storage allows a place for the BBQ, lawn chairs, lubricants, sun sail, decorations and so on. The rear storage and well provide space for the solar panels, electrical stuff, tools, pink antifreeze and so on. 


Getting it all together, Winter 2015
Well, we were delayed again this year. Not a breakdown because this was an El Nino year and it has been both wetter and milder. We were able to head out much later in December than I would be comfortable in doing and yet we avoided nasty weather.

Getting here two days before Christmas required that I set serious priorities, get fully into action, be very effective and make good decisions.

So, today we are about 99% set up. Not bad after arriving 15 days ago and with two holidays. We have DSL internet access, we are wired, we have added the stuff it takes to enjoy the patio, I've got the electronics set up including the wi-fi internet and the land line and even the wireless phones. We've re-arranged things a couple of times as we settle in.

Sitting in one place for a few weeks allows and demands a different approach. We don't have to "batten down the hatches" every other day. We are enjoying our surroundings.

I also have the added challenge of doing the things necessary to run my business. There are always surprises. This year, my 'home state' made it mandatory to online file certain tax documents.  But I didn't have access, so I set that up today and gave the necessary "third party" access codes to my accountant who is 1600 miles away. For anyone with a C corporation, there are mandatory tax filing dates. These are not to be missed. Prior to beginning my trek I completed my calendar year 2015 work early and sent the necessary files to my accountant. He'll be able to file everything as necessary and prior to the due dates.  One thing about electronic filing is that I no longer have to sign each and every document. A few years ago the accountant would send me everything, I'd sign each and every document and then mail it.

To make things a bit more complicated, my company's fiscal year end is not December 31. So I file calendar year end documents (sales tax, state withholding, federal withholding, FICA and Medicare taxes) and then also do the W-2s and W-3s. But the corporate income tax filings don't occur for my business until July. At that time we also must have completed any SEP IRA contributions.

Of course, there are alternates. Barter, use Bitcoin or simply take cash. Income taxes? Who needs income taxes! Well, I think most of us would agree we need infrastructure, a social welfare system and we should each pay for this.

So I am a fully registered and dues (tax) paying corporation.

Settling In
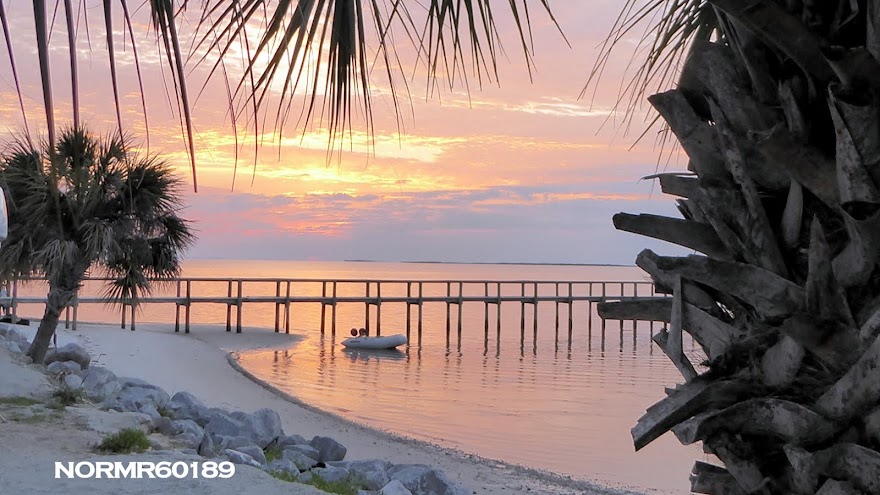
I think this is the first day in 90 that I have finally "arrived" somewhere. I don't have three pages of "to do" lists, all of the identified problems and issues have been resolved. The "gotchas" that I had identified have been resolved. All of the systems, personnel, electronics and so on are working as intended.  I have a few moments of respite. I can sit back at 6:47pm, sip the wine and reflect on the day. Now, isn't this the way life should be?

As for extended family and my volunteer gig, well, the best I'll ever do is manage these and set boundaries. "You can lead a horse to water but you cannot force it to drink."

Meeting the Neighbors
Our neighbors are happy and contented. One of the things about RVing is meeting people who generally are happy to be where they are. If they aren't, then they just up and move on. Unlike the "sticks and bricks" crowd, RVers are not victims of their surroundings. Most decide where and how to live. Of course, we each do that, but some of us pretend we don't. These are the dangerous ones.

<Oops, gotta go turn the bratwurst on the grill>

Now, where was I? Oh, yes. Living in 702 cubic feet is a choice. It is about discovering the opportunity and the joy of minimalistic living.

Bon Appetit!


Tuesday, January 5, 2016

Refrigerator Thermometer Upgrade


Bookmark and Share


I added a simple bulb-style thermometer to the RT to monitor the inside temperature. It worked well hung over a door shelf edge. But the other day I dropped it on the carpeted floor and the darn bulb cracked.

I had purchased an inside/outside digital thermometer for another purpose but decided to try it in the refrigerator. It works great. Here's a photo of the display unit and the remote sender. I had taken the remote out of the refrigerator about a minute prior to taking the photo. "Out" is the temp on the top door shelf  of the refrigerator.


It is frustrating that the simple bulb type broke. I prefer simple. But the remote does have the advantage of allowing display of the temperature with the refrigerator door closed. 

Here's a photo of the type which broke, before the glass bulb was fractured:


Monday, November 30, 2015

My list of Spare Parts and Tools and Stuff


A few of the manuals that came with our Roadtrek


Bookmark and Share


Updated December 11, 2015, September 30, 2017, July 2021
This is a personal list and what we each consider to be essential will vary. I think it is helpful to have some basic tools, etc. However, this will be determined by your style of trekking. If you boondock you might want to expand the list. If you trek in the vicinity of major towns, you will probably have many hardware stores and you may have an authorized Roadtrek dealer/service center nearby, etc.

However, my approach is to be self-sufficient and self-reliant. I approach this as a necessity because 210Ps are no longer manufactured and I am not all that assured that the repair technicians fully understand the details and complexity of my 2013 210P. I can say that when I purchased it I crawled beneath it and took a lot of if apart to figure it out.  I've changed the oil in the Onan generator, studied the electrical system, replaced the battery separator, replaced the AGM coach batteries, added solar, etc. I doubt if most of the RV techs have that specific experience.

I've posted about my maintenance costs and these are lower than others might experience because I use my parts and tools to maintain the coach of my 210P.  I'm aware of the limits of my abilities and so I use specialists and professionals to maintain the chassis, including the engine and transmission. I do follow a rigorous preventative maintenance schedule.

I originally posted this list because a while back I was asked about what I pack for repairs or to maintain our 210P. Someone at the FMCA Roadtrek cyberrally also asked this question and so I originally posted this in 2015.  Keep in mind that G and I have trekked for up to 100 days continuously and we stop at a couple of "lily-pads" we have established in the U.S. Our perspective may not be yours.

I've used just about everything on this list while on our treks, or provided it to others. I do a lot of my "modifications" and other things while trekking and so I need the tools, etc. to do them. For example, I added the interior LED light strip while trekking. On the road we have lots of time (sunrise to sunset outdoors) and the opportunity to think things through. I have used the 12VDC battery charger to fully recharge the chassis battery after retrieving the 210P from storage. As of July 2021 that battery is 9 years old. It would be wise to replace it as part of my "preventative maintenance" program. 

Some of these things I carry because I don't want to interrupt a trek to find a good hardware store, find a qualified RV specialist or wait for a specialized part to arrive via UPS. That's a personal choice.

Here is a partial list.

These are items that I consider useful and important. The reader should consider each on this list from the context of how they use their Roadtrek.  For example, I don't want to wait for a macerator pump replacement to arrive if we are trekking, so I carry one.  Ditto for a spare Thetford Sanicon hose. Waiting may be perfectly acceptable for the reader. On the other hand, I don't carry a spare water pump because they are so common at RV dealers and repair depots. If the TrippLite inverter-charger were to fail I can charge the coach AGM batteries with the solar system I installed and by running the chassis engine. Ultimately, I view a parts list as a means to avoid disruptions to treks between our lily-pad stops. Those stops are for weeks and they provide ample time for me to do any upgrades or repairs.  

1. Spare Parts:
  • Suburban hot water heater anode (232767 magnesium)
  • ShurFlo macerator pump 3200-001 (12V)
  • Thetford Sanicon hose for macerator discharge. 
  • Fuses of all types and sizes.
  • JR Products 10245 Stainless Steel Baggage Door Catch
  • (2) fluorescent bulbs for overhead lights.

2. Tools, Accoutrements and Such, categorized:
Electrical:
  • Dogbone 50A to 30A, Camco 55175
  • Camco 55165 15M/30F 12" PowerGrip Dogbone Electrical Adapter with Handle
  • 12V 10 ft. extension cord
  • 12V three-way splitter (3-outlet cigarette outlet adapter with digital voltmeter)
  • Digital VOM for checking 120VAC and 12VDC.
  • Klein Tools NCVT-2 Dual Range Non-Contact Voltage Tester
  • Electrical tape (Scotch 33)
  • ESI 305M 30 Amp Fuse Buddy Mini Tester and adapters for different automotive fuses
  • Progressive Industries EMS-HW30C (installed with twist-lock 30A connectors)
  • (2) 25 ft. #16AWG 3-conductor extension cord.
  • Miscellaneous electrical connectors and crimping tool.
  • Miscellaneous electrical wire (#14 AWG).
  • Soldering iron and solder
  • AAA and AA rechargeable batteries with charger
  • (2) Maglite AA LED flashlights
  • 12V Jumper cables
  • NOCO Genius 10 Battery charger-maintainer.
Plumbing:
  • Camco 39313 4" x 3" Sewer Hose Seal
  • Camco 22484 Water Bandit
  • Camco 40043 TastePURE Water Filter with Flexible Hose Protector
  • Water pressure regulator
  • Teflon tape (for replacing hot water heater anode)
  • Paste thread sealant (for plastic fittings)
  • 50 foot reel-in water hose (American Specialty MRT-50 50' Marine Handi-Hose & Reel)
  • 25 ft. & 10 ft, water hoses (potable)
  • 2-way hose connector with valves
  • Spray nozzle for hose
  • Funnel with 18 inch flexible discharge (for pink anti-freeze)
  • Garden hose 0-ring washers
Lubricants:
  • Powdered graphite
  • WD-40
  • Spray Lithium Grease
  • 30W Oil for Onan Generator, and other purposes.
Adhesives and Fasteners:
  • Black and grey duct tape
  • White plastic tape
  • Clear packing tape
  • 3M SkotchBlue (interior and exterior tapes)
  • Rescue Tape (for pipe leaks)
  • Reflectix FT21024 2" x 30' Reflective Insulation Tape (I only take what I need with me)
  • 3M Scotch adhesive putty
  • Eternabond white RV EPDM repair tape (for roof leak temporary repair, etc.).
  • Assorted nails and brads
  • Assorted machine screws, washers and nuts
  • Assorted self-tapping screws
  • Goop
  • Duco Cement (a general purpose glue)
  • 5-minute epoxy - JB Weld
  • Assorted plastic cable zip ties
  • Velcro cable ties
  • Bungee cord set
Tools:
  • 1-1/16 inch socket with extender and handle (for hot water tank anode)
  • Various sockets
  • Neiko 100-Piece Security Bits Set with Hard Storage Case (includes S#1, 2, 3)
  • Neiko 03044A 1/4-Drive Mini-size Ratcheting Screwdriver and Bit Set, Cr-V, includes 7 Bits
  • Ratchet screwdriver handle for bits.
  • Various Phillips and straight blade screwdrivers
  • Needle nose and sidecutter pliers
  • Wire stripper
  • Adjustable wrenches (8 inch and 12 inch) crescent wrenches.
  • Channellock pliers (small)
  • Channellock pliers (large)
  • Hammer
  • Square edge
  • 25 ft. tape measure
  • 6 inch bubble level
  • Fiskars 1/4 inch hand drill.
  • Stanley 15-809 Metal Mini Hacksaw
  • Hand Axe
  • Pop-rivet tool and rivets
  • Magnifying glass
  • Right-angle mirror
  • 3-Piece Shovel - Snow removal
  • Reflective triangle - automotive distress
Miscellaneous:
  • Copy of all manufacturer's manuals for the RT (RT, Suburban, Thetford, etc.) Many are in pdf format on my PC laptop.
  • List of all installed equipment including model and serial numbers, if known
  • Valterra A10-2606 FridgeCool Fan
  • Campbell Hausfeld CC 2300 Portable Inflator
  • Set Walkie-talkies
  • Soft-close door bumpers (small) for cabinets
  • Felt adhesive bumpers (rectangular and round)
  • 3M "Command" hangers - various sizes and types
  • 1/2 inch aluminum angle x 30 inch
  • Aluminum bar 1/16 x 30 inch
  • (2) bricks with holes
  • Awning hangers
  • Highland Washdrops Wash and Shine Solution
  • Expandable handle automotive soft scrub mop for vehicle exterior
  • Scotch-Brite Scrub Sponges, Non-scratch
  • Scotch-Brite heavy duty sponge
  • 50 ft. cord, tent pegs, guyline adjusters, etc.
  • Sea-Foam gasoline additive (for gasoline generator, transferred to 1-qt. aluminum bottles)
  • Alcohol wipes
  • Rags
  • 3 watt solar panel for vehicle (chassis) battery
  • Bleach for water system sterilization
  • 2-gallons pink anti-freeze (if winter trekking).

Solar Charging of Coach Batteries:
  • BatteryMINDer Model SCC-005-AA-S3
  • 50 watt solar panel
Additional Tools:
  • Kill-A-Watt P3
  • Infrared (non-contact) Thermometer

Original Material: Roadtrek210.blogspot.com


Thursday, November 26, 2015

Setting Up the Winter Base


Bookmark and Share


Drove to the southwest with the RT to set up our winter base. Left during a three day rainstorm as the consequence of a large stationary front which extended from the gulf of Mexico to Canada.

I recall a Thanksgiving a couple of years ago in which serious snow arrived in the midwest. Once everything ices over it becomes difficult or impossible to get the RT out of storage.  Then there was the early December snow and ice storm in 2013.

"He who hesitates is lost" is my motto in late November and early December.

So, at 4:00am on the 18th I got into the RT during a serious downpour, but I had loaded the RT during a break in the weather during the previous evening. I headed south, south-west.  By the time I got to St. Louis it was merely overcast (9:00am). By Oklahoma the clouds were breaking. It was an easy, but tedious drive of about 1782 miles. My Verizon Navigator had predicted 1770 miles, but a road closure in northern Oklahoma resulted in a slight detour. Not bad and a lot better than my TomTom GPS (aka "DumbDumb.").  Total time with engine spent running was 29:15 according to the Chevy 3500.

Spent the first night in a rest stop in Oklahoma. Low of about 40F so I ran the generator and the heat pump, got up at about 3:00am and continued my trek. Spent the next night in a rest stop in New Mexico. At about 4500 ft elevation the temperature reached a low of about 31F. Again, ran the generator and the heat pump. I could have used the propane furnace, but it was mild when I went to sleep.  At dawn I continued on the road.


By 10:30am on the 19th it was clear skies to the horizon.


At about 11:00 am on the 20th I arrived at my destination.  Blue skies and warm weather. Now, this is more like it!


After checking in, I went about getting the RT into the bay.


As expected, it was a tight fit.


There were a few surprises, but no show stoppers.  Worked out the details and settled in for a nice, restful sleep.


Spent several days getting things set up. The RT looks odd in the larger bay. I do get some stares and a few questions from passers-by:


I then left and boarded a plane to return to the northland. It was an uneventful flight and I strolled through O'hare at about 7:00pm on the 23rd.