7 Pages are shown on the Main Page.

7 pages are shown on the Main Page. To see additional posts, click on the link "Older Posts" at the bottom of the main page. For videos go to https://www.youtube.com/@normanretzke4377/videos click "skip" to avoid ads


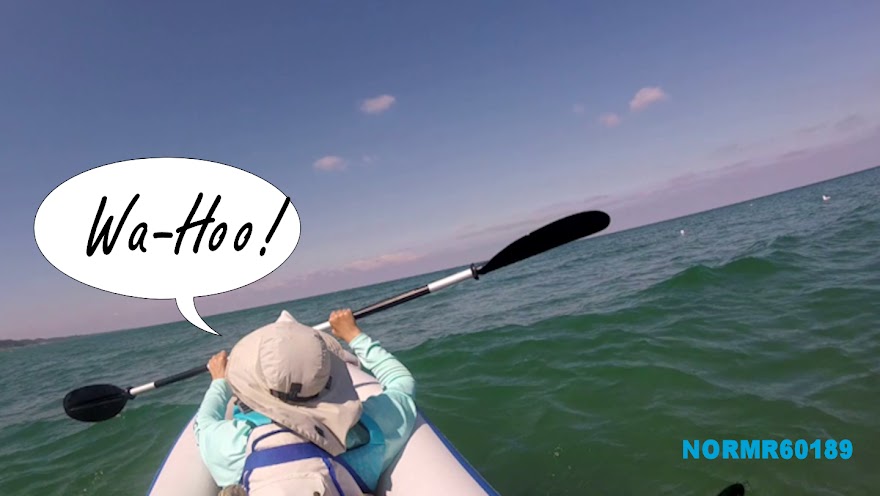
G has a "swell" time kayaking

G has a "swell" time kayaking
G has a "swell" time on Lake Michigan in an inflatable canoe

Dawn on the Gulf of Mexico

Dawn on the Gulf of Mexico

Warren Dunes Sunset

Warren Dunes Sunset
Warren Dunes Sunset

Wednesday, July 21, 2021

Grilling - Corn on the Cob and Baked Potatoes - Grill Comparison


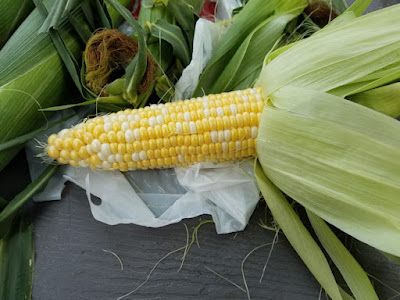
Corn cleaned and soaking


Coleman "Fold-n-Go" propane grill - We carry in the side drawer of the 210P


Bookmark and Share

This post is about grilling corn on the cob and baking potatoes, and the grills and methods we use. We do a lot of outdoor cooking. Cooking outdoors is one of the joys and benefits of RVing in our Roadtrek.  There are also practical reasons including more outdoor space for cooking and if we cook outdoors we don't mess up the kitchen area. That reduces the daily cleaning chores. We can grill outdoors if temperatures are moderate.  At temperatures below 45F too much heat is lost and cooking is uneven. However there are ways to cook outdoors, all the way down to freezing if one is so inclined. 

To grill we carry a small propane BBQ in the side drawer of the Roadtrek.  However, because we do most of our grilling in four primary locations we do have a variety of grills available. Three are left at these locations and are available. When cooking outdoors we use propane or electric grills, as well as an electric resistance burner for boiling water for pasta, etc. We also carry an inductive electric burner in the Roadtrek. We use the inductive electric burner with cast iron to cook both inside and outside of the Roadtrek.  When used outdoors the inductive burner and cast iron are a no-mess option for cooking sausage or bacon in the morning. We prefer to conserve propane for use in producing hot water and for the furnace.  We have never used the BBQ grill propane hose that was included in our 2013 Roadtrek 210P. When the regulator for this hose failed for the second time, I removed that regulator and capped the propane piping.  To gain access to that 10 PSI regulator I had to have the rear bumper removed.  Twice is enough!

Our Roadtrek 210P camper van came equipped with three methods of cooking:

  1. .Microwave-Convection oven (electric).
  2. Two-burner propane range top.
  3. Short hose for propane BBQ grill, grill to be provided by the user. 

I added the following:

  1. Portable induction (electric) cooktop.
  2. Portable electric resistance stovetop burner.
  3. Propane BBQ.
Portable Gas Grills
We currently use four different barbecue grills, at various locations. All are modest in size.  My favorite is a Weber Go-Anywhere propane grill. It has precise temperature control, a sufficient cooking area, and a tall lid. But it doesn't fit well in the side drawer of our Roadtrek 210P.  In the Roadtrek we carry a Coleman Fold-n-Go propane grill.  Both of these use the small 16oz. green propane bottles. These bottles can't be recycled; I refill them from larger 20 Lb. bottles. A $6.95 adapter lets me do that and it not only reduces waste, this has saved me a lot of money.  At present propane where we are camping in MI is $3.69 a gallon at Tractor Supply and higher elsewhere. A 16 oz. bottle is about $3.70. I store 20 lb. bottles at each of the "lily pads" and that's where we store three of the larger grills. Two of these are propane and one is an electric Weber Q2400

Inductive electric cooktop and Lodge Grill/Griddle - Dinner inside while 15F outside
 - 


Cooking with the Coleman Fold-n-Go and the inductive electric burner with Lodge cast iron

Weber Go-Anywhere propane grill with 14.1 oz propane bottle

Comparison of the Coleman and Weber while on a trek.  Both have folding "legs". What isn't obvious in this photo is the greater height of the removeable lid of the Weber, which we have come to appreciate:

Coleman Fold-n-Go versus Weber Go-Anywhere

The most challenging of the grills to use is the Coleman Fold-n-Go which we carry in the Roadtrek. This is because of the small grilling surface and the low height of the lid.  For example, cooking corn on the cob on the Fold-n-Go can be difficult because the lid will not close completely if the contents are too tall. However, it has one very redeeming feature;  we can carry it in the outside storage compartment of our 210P.  However, we can use a Lodge cast iron reversible grill/griddle which we carry and which is in a photo here.  

We are currently at our campsite in Michigan, on the eastern shore of Lake Michigan. At this seasonal site a neighbor who was vacating put their dual burner Coleman LXE grill up for sale at a very attractive price. Because we are seasonals we purchased it and we store it on site over the winter, when we are elsewhere.  We also have a winter site and we store another grill there. We store a Weber electric grill at our Southwestern site. The Weber Q2400 was provided with a rig we purchased; the price was right; it was free!  After using it for three winter seasons I can say it works very well. 

Sunset tonight


For ease of grilling I like the electric Weber Q2400 better than the Coleman LXE 2-burner propane grill. However, with two burners and a larger cooking area the LXE has some advantages.  One issue with the LXE is it tends to run "hot" and for another, in prevailing breezes the burners will blow out.   I've made some simple modifications, including adding clay tiles, to better distribute the heat. I added a couple of makeshift aluminum foil wads on the ends to reduce the impact of breezes and re-direct airflow. I get better results this way. 

Two clay tiles to moderate the temperature.  The grill can accommodate three tiles. 

A segue into history

Where did I learn to grill?  From my father, who was a DI in the army in WWII. He made me responsible for all of the grilling at the age of 11. Building on that, for the next 20 years I grilled exclusively using charcoal and improved my craft. Charcoal requires a different skill set than does propane fueled grilling. Prior to that I was the short order cook for the family Sunday breakfast. Later I did a lot of camping with the children and as a youth group leader. We made it a challenge to cook exclusively with wood and if available we used a sheep-herder's stove with large flat surface; wood burning, of course. Backpacking and canoeing treks were all about efficiency and light and compact cookware. I camped from (-)25F to (+) 103F. Cooking in the wild is a totally different skill and beyond the scope of this post.

Grilling Corn on the Cob

One note: when I wrap in aluminum foil I put the shiny side inwards (facing the item being cooked) and the dull side outwards, toward the heat source. I want minimum outward reflection of the heat.

We are currently at our campsite in Michigan, on the eastern shore of Lake Michigan. We cook breakfast sausage and bacon outdoors on a cast iron skillet.  We also cook most dinners outdoors using BBQ grill, and cast iron. 

It is mid-July and locally grown corn is available for 50 cents an ear. We enjoy it grilled. Corn on the cob is an American phenomenon. Some years ago, a multinational client brought in a large number of technical staff from Germany. One night we all went to a BBQ and they were appalled that we Americans were ordering corn on the cob as a vegetable. It was understandable. In Germany corn is grown for pigs. German corn has large kernels and is very coarse. It does not resemble the sweet, tender corn that Americans enjoy. 

There are different methods to cook sweet corn. Some boil it but my favorite method is to grill it. I carefully pull back the husk, remove the silk, clean it, soak in water (or salted water), rewrap the husk, trim the excess stalk and wrap in foil.  I cook it for about 45 minutes on a medium grill, turning it at least once.  If the corn is late in the season or has been grown under adverse conditions, I will soak it in a mixture of water and milk.   I have been told that the lactose in the milk is an aid. I really don't know. But, soaking the corn be it in water or milk does improve the juiciness. 

Note: "Medium" heat setting varies from grill to grill. For example, on the Coleman XLE, with only one burner lit, Low" on only burner below the corn is sufficient. With the Weber Go-Anywhere, medium is perfect. Because of heat loss, the Coleman Fold-n-Go requires more tending because of heat loss if the top can't close completely over the ears.  If you want better results, or are new to grilling, then temperature monitoring is helpful. I'll post on that in the near future.

I don't shake the ears before wrapping in aluminum foil. I attempt to retain as much water as possible. The goal is to steam the corn wrapped in foil. I do think the husk improves steaming, adds flavor and it protects the kernels from overheating.  I may slightly overcook the corn and "burn" the husk but the odor is wonderful when the corn is unwrapped.  And, the kernels are fine, protected from overheating by the husk. 

Preparing the corn


Corn silk removed and ready for soaking


Cleaned corn soaking prior to trimming and wrapping in foil

I trim the stalk and then wrap in aluminum foil. I cook for about 40 minutes on "medium" heat, turning 1-3 times. However, grills are notorious for their inconsistency. So, it is best to avoid undercooking.  When the corn is nearly done, I'll add the burgers, or whatever. 

Corn grilling and almost done - add the burgers

After removing it from the grill, I unwrap the foil.

Removed from the foil

Husk removed - butter and then eat


Russet Potatoes on the Grill
Another favorite is baked potatoes. I scrub the potato using a brush for this purpose. When dry I rub with olive oil and then salt it. After that, I wrap it in aluminum foil. To facilitate cooking I use an aluminum skewer or nail.

Oiled and salted potato

Foil wrapped and skewered potatoes - aluminum nails reduce cooking time

Potatoes baking on the Coleman LXE grill - Note the clay tiles
 
I cook the potatoes for 40-60 minutes, depending upon the grill temperature. I flip once or twice. The clay tiles in the photo will reduce potato charring, but with the olive oil rub it is possible to get a nice crisp skin.  We eat the entire potato when prepared this way.

Add a salad, or coleslaw, grilled broccoli and burgers, bratwurst, hot dogs, grilled chicken, steak or salmon and we have a wonderful summer dinner. 

Original Material: Roadtrek210.blogspot.com

Tuesday, July 20, 2021

Western and Canadian Fires create haze


Sunset disappears into smoke and soot - July 19, 8:55pm 

Bookmark and Share

The sunsets over Lake Michigan disappeared in soot and smoke created by fires to the west. 

Fires in Manitoba and Ontario, Canada captured on 11 July 2021, by the VIIRS instrument, aboard the joint NASA/NOAA NOAA-20 satellite:

NASA July 18, 2021 over the Great Lakes

NASA July 19, 2021 over the Great Lakes

The smoke and haze has been noticeable, and the sun became a bright orb at dinner time.  Sunset was at 9:16pm, but the sun faded and had all but disappeared in the western sky by 8:55pm. We were on the eastern shore of Lake Michigan.

Sunset approaching 8:02 pm

8:57 PM - Yes, the evening sun is actually in this photo

Link to NASA:

https://earthdata.nasa.gov/worldview/worldview-image-archive/fires-in-manitoba-and-ontario-canada


Original Material: Roadtrek210.blogspot.com

Friday, July 9, 2021

Vivo Smartphone Flying Camera


Smartphone with Flying Camera

Bookmark and Share

Patent issued for flying smartphone camera

Vivo has been given a patent for a small drone tucked inside of a smartphone.  In fact, the small drone has two cameras, one forward facing and the other downward facing. So, who knows? In a few years we all may be taking aerial photos.  This drone is so small that it skirts current FAA rules about registering and publishing aerial drone photos.  However, a drone this small will have difficulty dealing with wind.....

Here's a link to an article:

Vivo Smartphone Drone Patent Articleivo-smartphone-drone-patent-1637685/

Original Material: Roadtrek210.blogspot.com


Tuesday, July 6, 2021

Side Door Electric Lock Issue


Using 3M Scotch-Brite Rough Pad to scour electrical contacts (photo after cleaning)


Bookmark and Share

The side door electric lock stopped working with the Chevy fob.  It became intermittent.

This was an easy thing to fix.  There are two, spring loaded contacts on the door and these align with two copper pads on the inside of the door frame.  When the door is closed, these contacts should align and the spring pressure should be sufficient to pass electric current to the door lock solenoid. 

I concluded that wasn't happening.  I inspected the contacts, which were no longer bright brass and the plates were slightly pitted where physical contact is made. I concluded that minor oxidation was creating sufficient electrical resistance to prevent adequate power from reaching the door lock solenoid.

In the old days, I would have used very fine sandpaper to remove the oxidation. 

Scotch-Brite is Superior

I decided instead to use a dry sponge which had "Scotch-Brite"  green scouring pad on one side (trademark of 3M company). I usually have a few of these as well as the blue sponge/pads for dishes.  However, for this chore a rougher pad than the blue was necessary. So I took an old green one and used it dry to buff the contacts.  About 30 seconds of rubbing was sufficient to brighten them up.

For industrial applications, a silver contact would be preferred, but for an automobile brass is the choice of the manufacturer.


Buffing the door contact plates

Buffing the door mounted, spring-loaded contact surfaces


After wiping the contact surfaces with a clean rag, the electric door lock worked as designed.


Original Material: Roadtrek210.blogspot.com (c) 2021


Wednesday, June 23, 2021

Why Don't I Post videos made from Drones? FAA "TRUST" Certification


Typical small, recreational drone


Bookmark and Share

All Drones are subject to FAA rules

If you go to my YouTube Channel, or read this blog, you won't see any videos made from drones.  Why is that, you may ask?  The answer to that question involves FAA rules for all drone pilots, including hobbyists and "recreational flyers".

The US Government, via the FAA, has been creating and enforcing ever stricter rules about drones. According to the FAA website:

"Unmanned Aircraft Systems (UAS or drones) must be registered with the FAA........ All drones must be registered, except those that weigh .55 pounds or less (less than 250 grams) and are flown exclusively under the Exception for Recreational Flyers."  All registered drones must be labeled with the registration number.

Furthermore, the FAA website states:

"Failure to register a drone that requires registration may result in regulatory and criminal penalties. The FAA may assess civil penalties up to $27,500. Criminal penalties include fines of up to $250,000 and/or imprisonment for up to three (3) years. "

Mandatory online training required to fly legally

As of June 22, the FAA rules for recreational drone flying include taking The Recreational UAS Safety Test (TRUST) and carrying proof of test passage any time one flies a drone for recreational purposes.  It also requires that all such drones be registered with the FAA by the owner. However, even with this license, videos made for recreational purposes may not be posted here.  Why?

The FAA rules have reached the point where flying a drone and creating a video for pure "personal entertainment" is allowed, but any posting on YouTube, a personal website and even using a drone to video the gutters of one's home is considered a non-recreational "commercial" enterprise.  If I flew my drone and used it to inspect the roof of my RV, that would be a non-hobbyist, non-recreational use according to the FAA.  Such use would be automatically a "commercial" use.  Commercial use requires a different license.  

Non-recreational use has resulted in significant FAA fines and in one publicized case a fine of more than $100,000 was levied.  Well dear reader, if you want to see my videos, send me a comment with your email address and I'll consider making videos and starting a GoFundMe campaign to which you can make contributions to pay my fines.  LOL.

I have owned several drones, but I have avoided any possible use other than "personal enjoyment" which is why you have not seen any videos by me using a drone.   The registration TRUST requirement is new.

I am acquiring a FAA Part 107 drone pilot's license. That does not assure than any of my readers will ever see a video made with one of my drones.  

In 2018 the Congress directed the FAA to develop a recreational drone operator test. It only took three years but the FAA has finally issued their test and more importantly, has issued certificates of instruction/test to certain businesses. So, one is not only required to take the test, one can actually take the test, and we now know where to go to take it. A big improvement.  But keep in mind that this recreational license only allows one to fly a drone legally; it does not allow posting of videos.

This recent action has moved the testing from the FAA limbo it has been in for several years.

FAA "TRUST" Certification

Here is the way one recent article describes this certification: "The FAA Reauthorization Act of 2018 directed the FAA to develop a recreational drone operator test: the drone industry provided stakeholder input, and the result is a free, online test administered by non-government test administrators. Recreational drone flyers who pass the test will be issued a completion certificate. When asked, a recreational drone pilot must provide evidence of having taken the test. Currently, however, the FAA has not announced a system to enforce test taking or to educate consumers about the test at time of purchase. In addition to clubs such as the Academy of Model Aeronautics (AMA) and the Boy Scouts of America, TRUST will be administered by qualified educational and training organizations across the country."

However, being a "recreational drone flyer" even after passing a test, does impose serious restrictions.  According to the FAA website:

"A recreational flyer is someone who operates their drone for fun or personal enjoyment purposes only. How to fly a drone recreationally: 
  1.  If your drone weighs more than .55 lbs, register your drone through the FAA's DroneZone.
  2. Pass TRUST.
  3. Follow safety guidelines on the FAA website or of an existing aeromodelling organization."
According to the FAA, this is the definition of "Recreational Flight": "Recreational flight is simply flying for fun or personal enjoyment." The FAA defines it this way:

"What is a Recreational Flight? Many people assume that a recreational flight is one that is not operated for a business or any form of compensation. But, that's not always the case. Financial compensation, or the lack of it, is not what determines if the flight is recreational or commercial. The following information can be used to help you determine what rules you should be operating under. Remember, the default regulation for drones weighing under 55 pounds is Part 107. The exception for recreational flyers only applies to flights that are purely for fun or personal enjoyment and weigh less than 0.55 pounds. When in doubt, fly under Part 107. 

Note: Non-recreational purposes include things like taking photos to help sell a property or service, roof inspections, or taking pictures of a high school football game for the school's website. Goodwill or other non-monetary value can also be considered indirect compensation. This would include things like volunteering to use your drone to survey coastlines on behalf of a non-profit organization. Recreational flight is simply flying for fun or personal enjoyment."

As a consequence creating drone video footage and posting here is expressly prohibited for any type of recreational flying.  

For more about the FAA rules about "recreational flight" and these are available at the FAA website:


BTW, I take no issue or affront with the FAA.  They are merely upholding the rules as stipulated by Congress.  Nor am I here to provide an opine if registration is a good thing or a bad thing. I leave that to the social media types, who have opinions on everything


Original Material: Roadtrek210.blogspot.com (C) 2021

Thursday, June 17, 2021

Windshield Repair - Chips and Star Cracks


Chipped Windshield - Star Crack with Crater - enlarged view


Bookmark and Share

Minor Windshield Repairs 

If my experience is typical, we all experience minor damage to our Roadtrek windshield in the form of chips or star cracks.  I've had two such noticeable experiences and a lot of minor dings. I repaired both of the noticeable chips using over the counter epoxy-resin repair kits. I've used kits by two different manufacturers. Both used the same repair technique and both did the job.

The windshield damage I've experienced was small, one was about 3/16 inch "bullseye" crater, the other a star pattern about 1/2-3/4 inch across.  The manufacturer of the kit I used to repair the "star" indicates that it is suitable for chips or damage of up to 1-1/4 inch in diameter.  Had the damage had been more serious, I would have had a professional do it.  However, my experience indicates that dealing with minor windshield issues is something an amateur can do.

How successful were the repairs? The bullseye became invisible after the repair.  With the star, there remained a barely perceptible hairline after the repair.

The bullseye chip was annoying because it was directly in front of my line of sight.  I repaired it with a readily available repair kit.  The second was more serious damage in the form of what is called a star. I was skeptical but decided to try a repair kit.

In my experience, it is best to do the repair in the shade, which the manufacturer recommends.  Follow the manufacturer's directions.  The kit I used recommended:

  1. Don't repair in full sun; perform in shade.
  2. Don't use for repairs larger than 1-1/4 inch diameter.
  3. Cure in full sun - the epoxy resin requires ultraviolet light to cure.
  4. For additional instructions read the printed sheet that comes with the kit.

I cleaned the window and picked any loose pieces out of the damage area using a sharp pin.   After cleaning the area I applied the resin per the instructions for the specified time.  After removing the injector,  pedestal and seal I applied the curing film and moved the Roadtrek into full sun to allow the resin to cure.

To reach the damaged area, a ladder or step-stool may be necessary.  That makes on-the-road repairs more awkward. I did both repairs while in a campground or RV resort.

For demonstration purposes, I took the following photos in full sun.  However, the actual repair should be done in shade. 


VersaChem Repair Kit


Contents of the Kit

Adhesive Seal applied to windshield over the star-chip

Pedestal attached to Adhesive Seal

Squeezing a portion of the Resin into the Pedestal (per instruction)

Injector on Pedestal

To complete the repair, follow the manufacturer's instructions and allow the epoxy resin to cure.

After Repair- You can't see it, because it is darn near invisible!


Original Material: Roadtrek210.blogspot.com


Wednesday, June 16, 2021

Summer Lily Pad - a Clean Roof


After Cleaning

Bookmark and Share

Cleaning the Roof and Awning 

With the return to our summer "lily pad" we cleaned the exterior.  We trek in our 210P but we have several lily pads to hang our hats. This post is about the exterior Spring Cleaning of the roof and sides of our 2010 Heartland Caliber, which is our cabin on the pond.   I'll be waxing and buffing the fiberglass nose when morning temperatures are above 70F.

I do exterior cleaning in the early morning before the exterior is heated by the sun.  If possible when it is overcast. I use a cleaning solution comprised of Dawn dishwashing liquid, hydrogen peroxide and water on the exterior.

I first spray with cold water, and then I apply the cleaning solution with a soft brush.  I scrub the entire roof, too.  

I spray the awning and then brush.  After knocking off the loose dirt I apply the cleaning solution and scrub again with the soft brush.  I then retract the awning while wet with the cleaning solution.  I let it sit for a couple of hours.  Then I unfurl and spray and scrub again. Then a final clean water rinse.

After cleaning, the slide already has tree droppings within minutes...

Awning after drying - already has tree droppings....


On the Roof

Original Material: Roadtrek210.blogspot.com